7 Powerful Ways to Fix Bambu A1 TPU Stringing and Z-Seam Scars
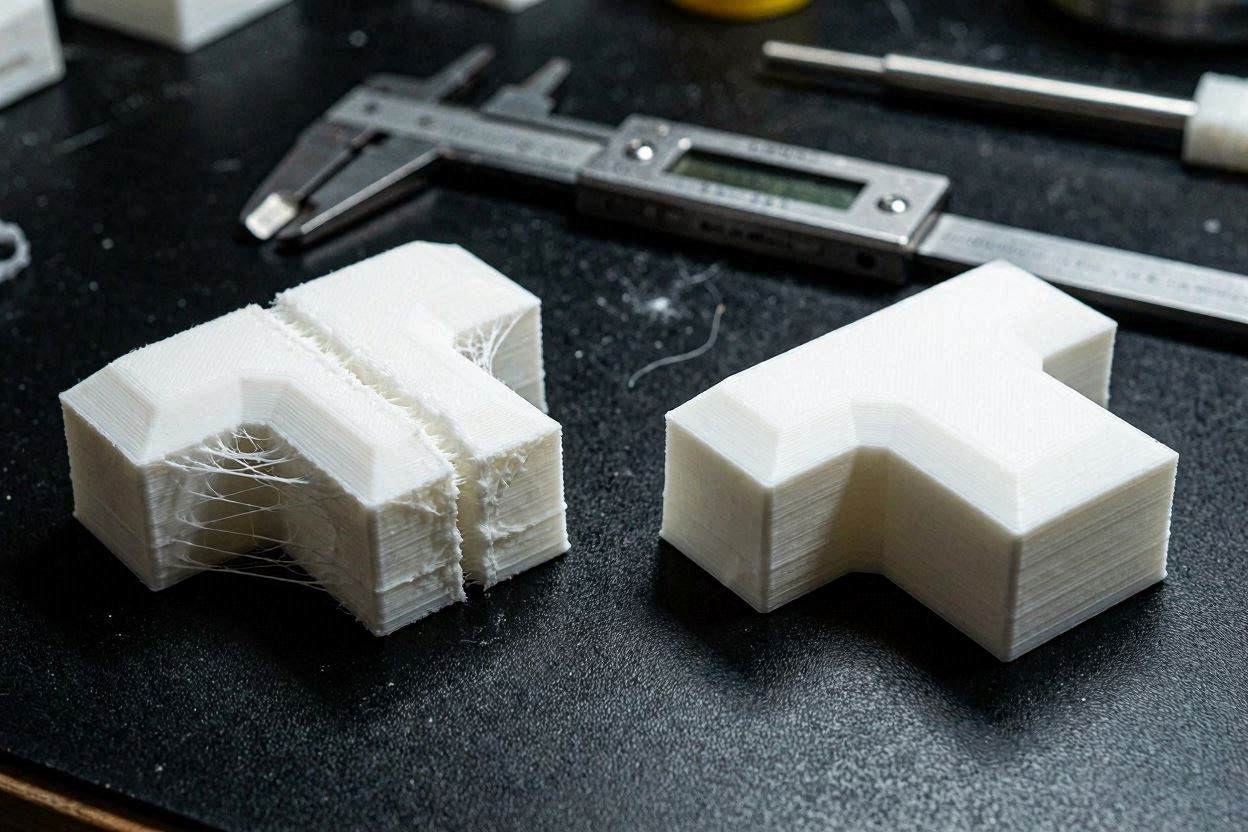
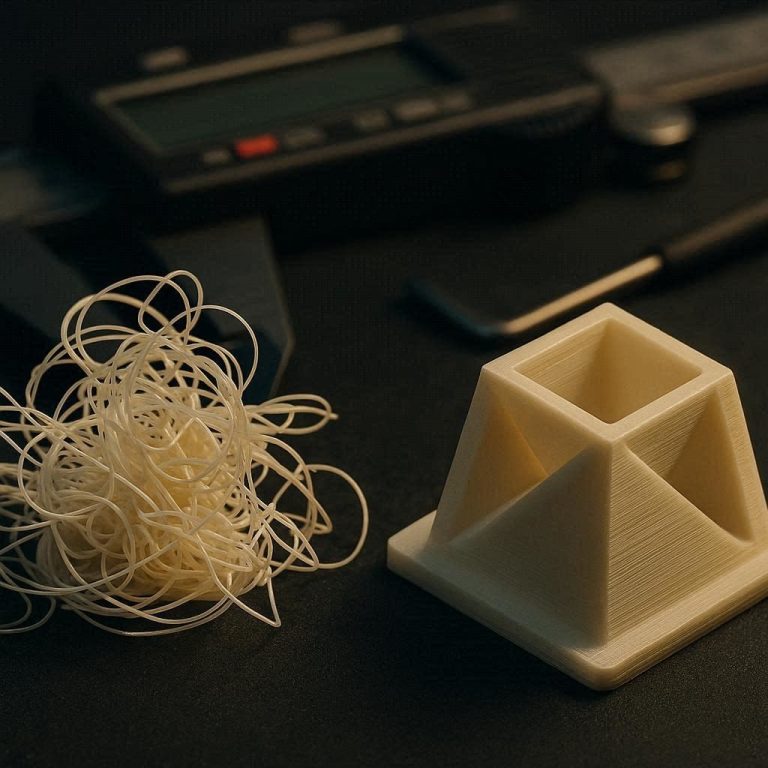
Attempting your very first flexible print is a major milestone in additive manufacturing. When you load a spool of TPU 95A High Flow (HF) onto your machine, you expect advanced kinematics to deliver a flawless, rubbery part, but if you do not know how to fix Bambu A1 TPU stringing, you will be met with a catastrophic mess. Many operators are instantly greeted with thick strands of filament bridging across empty gaps and an ugly, protruding vertical scar running up the side of the model.
If your print looks like a spider web and features a heavily bloated start/stop line, you are dealing with two separate but highly related thermodynamic failures. Attempting to fix Bambu A1 TPU stringing requires a complete departure from how you treat rigid polymers like PLA or PETG. Flexible filaments behave like highly compressed liquids inside the hotend, and you cannot rely on default slicer profiles to reign in this volatile internal pressure.
In this exhaustive, deeply technical diagnostic manual, we will deconstruct the exact fluid dynamics occurring inside your toolhead. We will isolate the root cause of the vertical Z-seam scar, explore the chemical hygroscopy of High Flow TPU, and detail all 7 exact Bambu Studio slicer configurations required to lock down your extrusion. By the end of this guide, you will have the precise engineering workflows to permanently fix Bambu A1 TPU stringing and achieve injection-molded surface quality on all flexible parts.
The “Quick Answer” / Key Takeaways Box
- The Root Cause: TPU is highly elastic. The extruder gears compress the filament like a spring, and when the motor stops, the spring decompresses, forcing plastic out of the nozzle.
- The Z-Seam Scar: The vertical line of zits and blobs is the Z-seam, where the printer starts and stops every layer. Residual pressure in the TPU causes it to ooze exactly at this transition.
- Moisture Expansion: TPU 95A absorbs ambient humidity in hours. Wet TPU boils inside the hotend, creating steam explosions that completely override your retraction settings.
- Volumetric Throttling: High Flow TPU is highly viscous at speed. You must throttle the maximum volumetric speed in Bambu Studio to prevent pressure surges.
- Scarf Seams: Utilizing the advanced Scarf Seam feature in modern slicing engines will completely camouflage the Z-seam, preventing protruding zits on your outer walls.
Understanding the Physics of High Flow TPU 95A
Before you begin altering parameters in your slicing software, you must understand the material chemistry of the polymer you are extruding. TPU (Thermoplastic Polyurethane) is an elastomer, typically rated on the Shore Hardness scale. While 95A is relatively stiff compared to ultra-soft 85A filaments, it is still highly compressible under mechanical load.
You noted that you are utilizing TPU 95A “HF” or High Flow. High Flow variants contain proprietary chemical modifiers designed to drastically lower the Melt Flow Index (MFI) viscosity of the plastic at elevated temperatures. This allows modern toolheads to print the flexible material much faster than traditional TPU formulations.
However, this high fluidity is a double-edged sword when it comes to dimensional accuracy. When heated to 220°C or higher, High Flow TPU becomes incredibly watery and inherently unstable. It wants to drip out of the 0.4mm nozzle orifice at the slightest provocation.
The “Compressed Spring” Dilemma
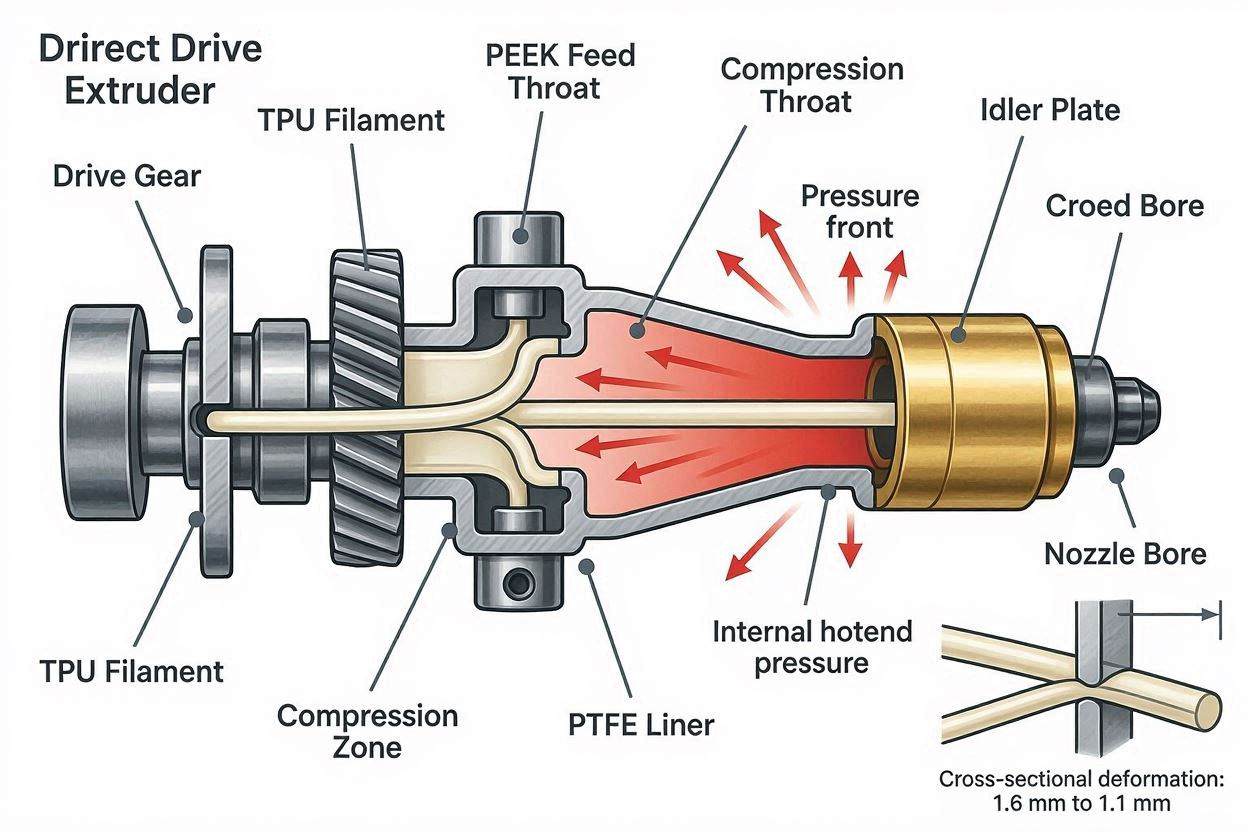
The Bambu Lab A1 utilizes a highly precise direct-drive extruder with dual hardened-steel gears sitting mere millimeters above the heat break. When these gears push PLA, the rigid filament transfers the mechanical force directly to the melt zone without deflecting.
When the gears push TPU, the flexible filament physically compresses between the gears and the restricted melt zone. It acts exactly like a tightly coiled physical spring. When the slicer commands the toolhead to stop extruding and travel across an empty internal cavity, the extruder motor halts instantly.
However, the “spring” of the compressed TPU is still holding immense potential kinetic energy. It physically pushes against the molten plastic in the heater block, forcing it to ooze out of the nozzle while the toolhead is flying through the air. This uncontrolled oozing creates the thick strands you are trying to eliminate. To effectively fix Bambu A1 TPU stringing, we must algorithmically bleed off this stored spring pressure.
Diagnosing the Vertical Z-Seam Scar
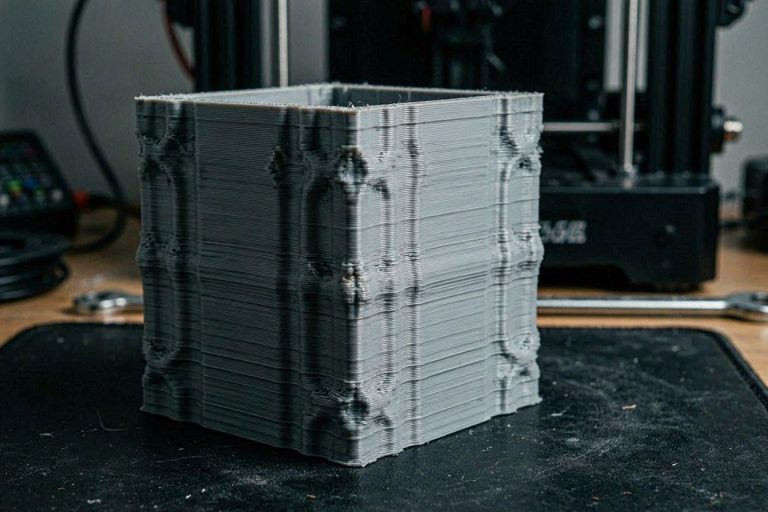
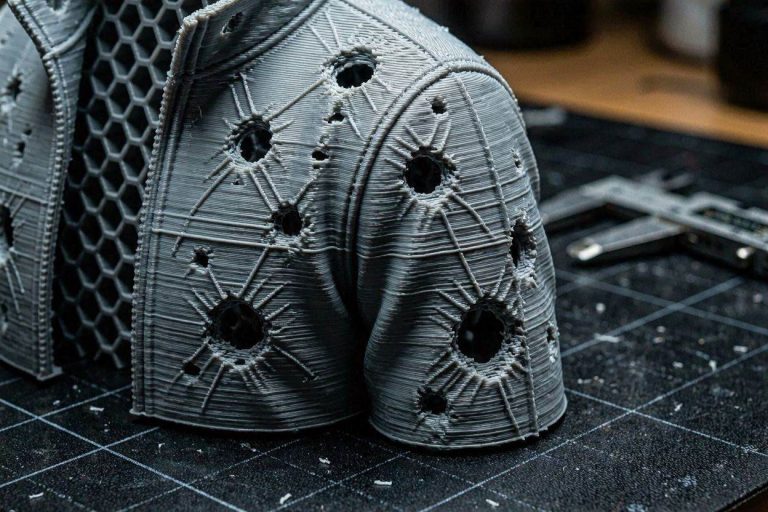
In your slicer preview, you likely noticed a distinct white vertical line running up the side of your model. In your physical print, this exact location featured protruding strings and ugly blobs. This is not a software glitch; this is the physical manifestation of the Z-seam.
A 3D printer cannot print a continuous, infinite loop to form a hollow shape without stepping up the Z-axis. It must start extruding at a specific geometric coordinate, trace the perimeter of the wall, and stop extruding at that exact same coordinate before moving upward to begin the next layer. By default, Bambu Studio attempts to align these start/stop points vertically to hide them in sharp corners.
Why the Seam Fails Catastrophically with TPU
When printing rigid materials, this start/stop point is nearly invisible because the extruder retracts the filament, the pressure drops instantly, and the toolhead steps up cleanly. Because TPU holds residual compression pressure, the stopping sequence is incredibly messy.
The toolhead reaches the end of the loop, the motor stops, but the nozzle continues to leak pressurized plastic for a fraction of a second. This excess liquid plastic deposits directly onto the Z-seam coordinate, creating a raised zit or an ugly blob. When the toolhead moves away to start the next layer, it drags a string of plastic from that blob.
To achieve a flawless outer wall and successfully fix Bambu A1 TPU stringing, you must command the slicer to aggressively manage the toolhead kinematics specifically at this Z-seam transition.
Step 1: Aggressive Filament Desiccation (The Steam Variable)
The single most common reason operators fail to fix Bambu A1 TPU stringing is that they are attempting to calibrate software to fix a chemical contamination problem. TPU is insanely hygroscopic, meaning it acts like a chemical sponge that absorbs atmospheric humidity from the air in a matter of hours.
When water molecules bond to the polymer chains of the TPU, they are dragged directly into the 230°C melt zone of the hotend. Water boils at 100°C, so as the hydrated plastic enters the nozzle, the trapped moisture undergoes an instantaneous phase change from liquid to steam.
The Explosive Extrusion Phenomenon
Steam expands volumetrically at an immense rate, and inside the tiny confines of a 0.4mm brass or steel nozzle, this expanding gas creates violent, miniature explosions. These steam explosions completely override your carefully tuned retraction settings.
Even if the extruder gears pull the filament backward perfectly, the expanding steam will forcefully push molten plastic out of the tip. You will hear audible popping, crackling, or hissing sounds coming from the toolhead, and your prints will be covered in unpredictable stringing and severe layer inconsistencies.
You simply cannot print wet TPU. You must place your spool of TPU 95A HF into a dedicated, active filament dryer set to 55°C and bake it for a minimum of 8 to 12 hours before printing. Do not rely on passive silica gel desiccant; you must use active heat to break the molecular bonds and drive the moisture out of the polymer matrix.
Step 2: Calibrating Elastomer Retraction Settings
Once your material is confirmed bone dry, you must adjust the mechanical pull-back limits of the extruder gears. Retraction is the process of reversing the extruder motor to pull the filament away from the melt zone, creating a slight negative vacuum that stops the nozzle from oozing.
Because TPU stretches under tension, standard PLA retraction settings (like 0.8mm at 35 mm/s) are entirely ineffective. When the gears pull back fast and hard on TPU, the filament simply stretches like a rubber band instead of actually lifting out of the hotend chamber.
Finding the Direct Drive Sweet Spot
To successfully fix Bambu A1 TPU stringing, you need a significantly longer and slower retraction profile. Open Bambu Studio and navigate to the Extruder settings within your TPU Filament Profile.
Locate the Retraction Length parameter and increase this from the default value to 1.2mm or 1.4mm. On a direct-drive toolhead, you should never exceed 2.0mm, or you risk pulling molten plastic into the cold heat break and causing a fatal mechanical jam.
Next, locate the Retraction Speed parameter and slow this down drastically to 20 mm/s or 25 mm/s. A slower, steady pull gives the elastic filament time to actually move upward without snapping or stretching internally. By pulling further and slower, you successfully evacuate the melt zone, preventing the high-flow liquid from dripping across the internal cavity.
Step 3: Implementing Z-Seam Wiping and Coasting
With the general airborne stringing mitigated, we must address the ugly zits protruding from the Z-seam line on your model. You must instruct the toolhead to physically bleed off the residual hotend pressure before the layer loop is fully complete.
Navigate to your slicer settings and ensure Wipe while retracting is enabled. When this feature is active, the toolhead will not simply stop at the Z-seam and lift up into the air.
Instead, it will begin its retraction sequence while simultaneously wiping the nozzle slightly inward over the already-printed perimeter. Set your Wipe Distance to 2mm and your Retract amount before wipe to 10%.
This specific kinematic movement uses the printed plastic wall to physically wipe the oozing nozzle clean, depositing the excess pressure securely inside the wall structure where it belongs. By the time the toolhead actually leaves the surface, the nozzle is completely depressurized, leaving the Z-seam perfectly flush and smooth.
[INTERNAL LINK: Placeholder for “How to Calibrate Pressure Advance for Flexible Filaments”]
Step 4: Activating the Scarf Joint Seam Algorithm
If you are using the latest iterations of Bambu Studio or OrcaSlicer, you have access to a revolutionary new geometric feature called the Scarf Seam. This is the ultimate, definitive way to hide the Z-seam scar on flexible prints and perfectly fix Bambu A1 TPU stringing at the layer transitions.
Traditionally, the Z-seam is a blunt, 90-degree start and stop collision. The Scarf Seam alters this geometry completely by commanding the toolhead to gradually taper the extrusion flow at the start of a layer, creating a thin wedge shape.
It then commands the toolhead to gradually taper the extrusion at the end of the layer to perfectly overlap that initial wedge. This creates a smooth, sloped interlocking joint rather than a sudden, vertical collision of highly pressurized plastic.
Configuring the Scarf Seam in Bambu Studio
Navigate to the Quality tab in your slicer and find the Seam section. Change the seam type from Aligned or Rear to Scarf Joint.
Ensure the scarf length is set to at least 10mm to provide a long, gradual slope. When this algorithm is applied to TPU 95A, the gradual taper completely absorbs the fluid oozing anomalies that usually plague flexible materials. The protruding zits vanish, and the vertical line will blend seamlessly into the rounded corners of your model.
Step 5: Modulating Hotend Temperature and Viscosity
You are printing a High Flow (HF) variant of TPU, which features chemical modifiers that make it incredibly fluid at standard operating temperatures. If you have dried your filament and tuned your retractions, but you are still battling fine, wispy spiderweb hairs across the print, your nozzle temperature is simply too high.
While the filament manufacturer may recommend printing at 230°C to achieve maximum volumetric flow rates, printing a small, highly detailed box lid does not require maximum flow. At 230°C, the TPU acts like hot syrup, dripping out of the nozzle during any travel move.
To instantly fix Bambu A1 TPU stringing on detailed, small-scale parts, you must increase the dynamic viscosity of the polymer. Drop your nozzle temperature from the default setting down to 215°C or 210°C.
By running the hotend slightly cooler, the TPU remains in a thicker, more paste-like state. It loses its tendency to drip and ooze uncontrollably during travel moves, allowing the plastic to shear cleanly when the retractions pull it back.
Step 6: Avoiding Perimeters and Optimizing Travel Paths
The next critical software adjustment involves manipulating exactly where the toolhead is allowed to travel when it is not actively extruding plastic. When your slicer preview showed the toolhead jumping across the empty internal void of your box lid, it created a massive vulnerability.
Any minor ooze that escapes the nozzle during that rapid jump immediately becomes a visible string suspended in mid-air. You must instruct Bambu Studio to alter its pathing algorithms to keep the nozzle completely hidden over existing geometry.
Navigate to the Quality or Others tab in your slicer and locate the setting titled Avoid Crossing Perimeters (often called Combing in other slicing engines). Set the maximum detour length to a very high value, such as 50mm or 100mm.
When this is enabled, the slicer will calculate complex travel paths that stay exclusively over already-printed infill and solid walls. If any residual TPU oozes out of the nozzle during this detour travel move, it is deposited harmlessly on top of the existing wall structure, completely eliminating the airborne strings and helping to fix Bambu A1 TPU stringing.
[VIDEO PLACEHOLDER: A highly detailed screen-recording tutorial demonstrating how to activate Avoid Crossing Perimeters to hide travel moves in Bambu Studio.]
Step 7: Throttling Maximum Volumetric Speed for TPU
The final and often most overlooked step to fix Bambu A1 TPU stringing is throttling your maximum volumetric flow rate. Even though you are using a “High Flow” TPU, flexible filaments simply cannot be melted and pushed at the same blistering speeds as PLA or ABS.
Volumetric Flow Rate (VFR) dictates exactly how many cubic millimeters of plastic the hotend is allowed to process per second. If your VFR is set too high, the extruder gears will aggressively force the TPU into the melt zone faster than it can liquefy. This creates a massive, catastrophic pressure bottleneck inside the nozzle.
When the toolhead reaches a corner or a Z-seam, this pent-up pressure violently explodes outward, causing massive blobs and stringing that completely ignore your retraction settings. The pressure must be neutralized at the source.
Navigate to your Filament Settings in Bambu Studio. Under the basic information tab, locate the Max volumetric speed parameter. For standard TPU, this is usually capped around 3.0 mm³/s. For your High Flow TPU, you can increase this, but you must hard-cap it at 6.0 mm³/s to 8.0 mm³/s. This strict software limit forces the printer to autonomously throttle its speed, ensuring the internal nozzle pressure never exceeds manageable thresholds.
Essential Hardware Upgrades
While adjusting slicer kinematics and dialing in retraction lengths will resolve the majority of your surface defects, flexible filaments mercilessly expose the fundamental thermodynamic limitations of stock hardware. Software cannot permanently bypass hygroscopy or cheap thermal engineering.
To achieve absolute, injection-molded surface perfection with TPU without spending hours tweaking slicer profiles for every new spool, you must upgrade your surrounding hardware ecosystem. Professional operators eliminate stringing variables by investing in industrial-grade components.
1. Active Filament Desiccation Ecosystems
As established, moisture is the absolute destroyer of TPU extrusion dynamics. Storing your spool in a plastic tub with a few packets of silica gel is entirely insufficient for engineering elastomers. Silica gel can only maintain current humidity; it cannot draw deeply embedded moisture out of the polymer matrix.
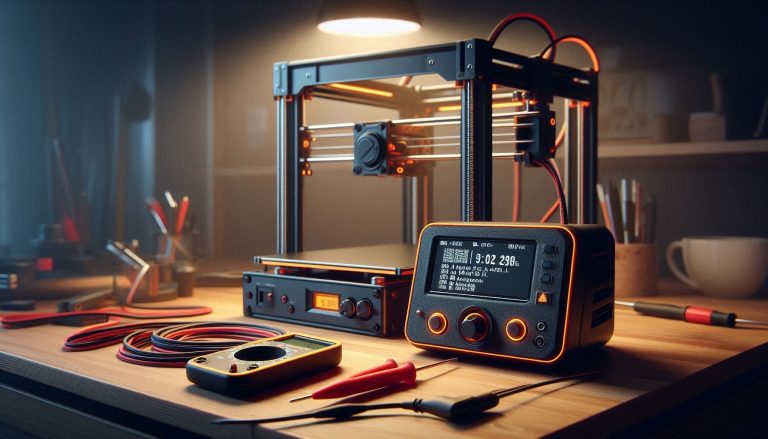
You must upgrade to a premium, active, heated filament desiccation system. High-end units like the Sunlu S4 allow you to actively bake the moisture out of four spools simultaneously at 55°C to 70°C. More importantly, these systems are designed to feed the bone-dry filament directly from the heated chamber straight into your extruder via sealed PTFE tubing.
By purchasing an industrial-grade dry box through reputable networks like ShareASale or direct manufacturer portals on Impact, you guarantee that your TPU never touches humid room air. Dry filament flows with absolute predictability, locking in your highly sensitive retraction settings permanently.
2. Upgrade to a High-Flow CHT Nozzle
When pushing highly viscous elastomers through a standard brass nozzle, the core of the 1.75mm strand often remains semi-solid. This requires massive downward torque from the extruder gears, which severely compresses the TPU “spring,” leading to explosive oozing at the Z-seam.
You must upgrade your hotend architecture to a premium CHT (Core Heating Technology) nozzle. These precision-machined nozzles feature internal copper splitters that divide the filament into three separate flow paths inside the melt zone. This exponentially increases the heated surface area, ensuring the TPU melts instantly and homogeneously.
By installing a premium CHT nozzle (available from industrial suppliers via the MatterHackers or PartnerStack affiliate networks), you eliminate internal hotend back-pressure. Your Bambu A1 will push TPU effortlessly, reducing internal compression and completely stopping the oozing dead in its tracks.
3. Install a Rigid G10 / FR4 Garolite Build Plate
While TPU stringing is a hotend and pressure issue, attempting to remove a successful TPU print from a standard textured PEI bed is an absolute nightmare. TPU bonds chemically to PEI at high temperatures, often resulting in torn bottom layers or permanently damaged build plates.
To achieve a flawless foundation for your flexible parts, upgrade to a rigid, 3mm thick G10 (FR4 Garolite) build plate. Garolite is an industrial fiberglass composite that offers incredible adhesion while hot, but allows TPU parts to self-release completely once the bed cools to room temperature. Sourcing a custom-cut G10 plate through specialist vendors guarantees your foundation is protected from the aggressive bonding properties of elastomers.
[EXTERNAL LINK: Official Klipper Documentation on Advanced Volumetric Flow Calibration]
Preventative Maintenance Quick-Action Checklist
To maintain your flawlessly clean, string-free TPU prints and protect your hardware investments, implement this strict preventative maintenance protocol before your next major production run:
- Dry Before Every Print: Never assume TPU is dry, even if it has only been sitting out for four hours. Always run your spool through an active heating cycle before loading it into the A1 toolhead.
- Clean the Extruder Gears: TPU is soft and inherently sticky. If your extruder tension was ever set incorrectly, microscopic shreds of rubbery plastic will be caked into the dual-drive gear teeth. Unload the filament and scrub the gears with a stiff nylon brush to restore maximum grip.
- Purge the Melt Zone Completely: Before switching back to PLA or PETG, heat the nozzle to 250°C and extrude 50mm of cleaning filament. Residual TPU left cooking inside the hotend will eventually carbonize, creating a partial clog that destroys future retractions.
- Deactivate the Part Cooling Fan: High Flow TPU does not require aggressive cooling for flat surfaces. Excessive part cooling can cause severe layer delamination and warping on flexible parts. Keep your fan speeds below 40% unless you are bridging empty space.
- Check PTFE Tube Friction: Elastomers drag heavily against the walls of cheap PTFE tubes. If your reverse-Bowden setup has tight bends, the extruder will struggle to pull the filament. Upgrade to high-tolerance Capricorn tubing to ensure a frictionless path.
By treating your 3D printer as a high-precision fluid dynamics system and respecting the unique chemical properties of elastomers, you will completely eliminate frustrating airborne strings. Lock in your retractions, activate your scarf seams, and start manufacturing with elite, industrial-grade perfection.
2 Comments