9 Proven Ways to Fix Common 3D Printing Problems (Permanent Solutions)
Whether you have just assembled your first bed-slinger or you are managing a farm of high-speed CoreXY machines, hardware failures are inevitable. Learning how to identify, isolate, and fix common 3D printing problems is the dividing line between an operator and a master technician. From sudden layer shifts halfway through a 20-hour production run to bed adhesion battles that feel like unwinnable boss fights, additive manufacturing is fraught with mechanical and thermodynamic variables.
In this comprehensive diagnostic manual, we will break down the most frequent and frustrating issues plaguing modern 3D printers. By moving beyond basic software tweaks and analyzing the physical kinematics of your machine, you will discover the root causes of warping, extrusion clogs, automated material system (AMS) failures, and Z-axis discrepancies. Let’s dive into the technical workflows required to restore your printer to factory-level perfection.
The “Quick Answer” / Key Takeaways Box
- Bed Adhesion: A simple wash with dish soap and warm water removes invisible oils better than isopropyl alcohol. For severe warping, deploy “brimears” (corner brims).
- High Infill Warping: Printing parts at 100% infill causes massive thermal contraction. Drop infill to 98% or 99% to relieve internal material stress.
- AMS Cardboard Slippage: Non-proprietary cardboard spools slip on internal AMS rollers. Print plastic rim adapters or tape the edges to restore grip.
- PETG-CF Nozzle Buildup: Abrasive and sticky filaments accumulate on the hotend. Use a silicone sock and wire brush between prints to prevent burnt droppings.
- Z-Offset Drift: Advanced eddy current probes can experience micro-drifts over months. Schedule a bi-monthly Z-offset and bed mesh recalibration audit.
1. Diagnosing and Resolving Bed Adhesion Failures
The first layer of any print dictates the structural integrity of the entire model. If the foundation fails, the asset is a total loss. Adhesion anomalies generally manifest in two distinct extremes: the print completely detaches mid-job, or it fuses so aggressively to the build surface that the plate is damaged during removal.
The “Not Sticking” Dilemma
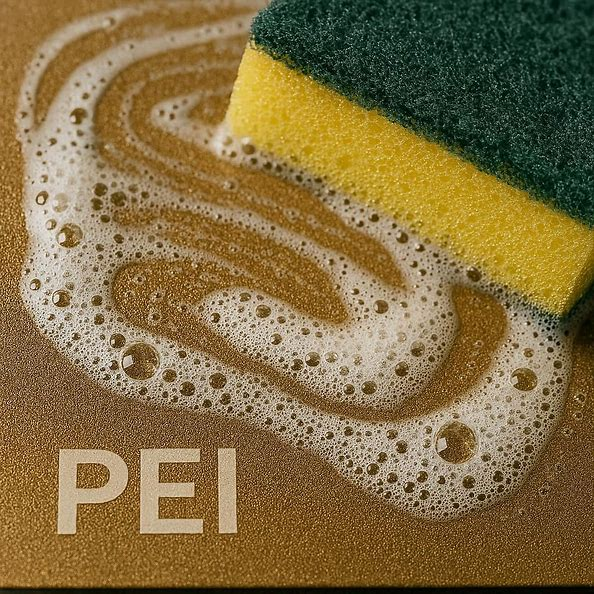
Many operators rely heavily on glue sticks or hairspray when a print refuses to stick. However, the most frequent cause of poor adhesion on modern PEI (Polyetherimide) textured or smooth plates is human interference. The microscopic ridges of a textured PEI sheet act as mechanical anchors for molten plastic. When you touch the build plate, the oils from your skin fill these microscopic valleys, neutralizing the grip.
To properly fix common 3D printing problems related to adhesion, bypass the Isopropyl Alcohol (IPA). IPA often just smears the oils around the plate. Instead, remove the plate and scrub it with standard dish soap and hot water. The surfactants in the soap break down the lipid bonds of the oils, completely restoring the PEI’s native grip.
The Over-Adhesion Hazard
Conversely, materials like PETG, TPU, and certain nylons have a chemical affinity for PEI and glass. If printed directly onto a clean surface, they will bond permanently, taking chunks of the build plate with them upon removal. In these specific material use-cases, a glue stick is not used to make the part stick; it acts as a sacrificial release agent. Applying a thin layer of PVA glue creates a barrier between the hot plastic and the bed, allowing the part to release safely once cooled.
: ]
2. Mitigating Thermodynamic Warping
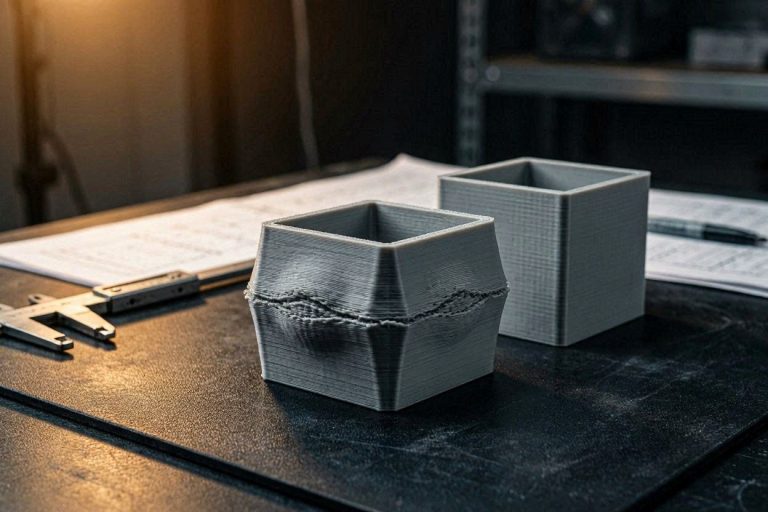
Warping occurs when a thermoplastic cools unevenly. As plastic transitions from its molten state back down to room temperature, the polymer chains contract. If the upper layers cool and shrink faster than the heated bottom layers, the resulting physical tension pulls the corners of the print off the bed.
The 99% Infill Hack for ASA and ABS
High-temperature materials like ASA and ABS are notorious for warping. Operators often attempt to print functional, heavy-duty parts with 100% solid infill for maximum strength. However, as infill approaches 100%, the volume of shrinking plastic reaches its absolute maximum, generating immense upward pulling force that even a perfect bed surface cannot hold.
A highly effective, community-tested solution is to drop the maximum infill from 100% to 98% or 99%. This microscopic reduction in material density leaves tiny internal voids that act as stress-relief zones. The part retains nearly all of its mechanical strength, but the internal thermal tension is drastically reduced, allowing the corners to remain flat.
Strategic Brims and “Brimears”
If you are printing objects with sharp, 90-degree corners, those corners represent concentrated stress points. Instead of wrapping the entire model in a massive brim (which is tedious to post-process), utilize “brimears.” These are small, custom-modeled circular discs placed exactly at the sharp corners of the model. They provide a massive increase in surface area exactly where the lifting force is highest, keeping the part anchored.
3. AMS and Multi-Material Supply Chain Issues
Automated Material Systems (like the Bambu Lab AMS or the Prusa MMU) have revolutionized multi-color printing, but they introduce complex mechanical supply chain vulnerabilities.
Cardboard Spool Slippage and Overloads
The most infuriating issue for multi-color operators is the dreaded “AMS Overload” error. These systems utilize motorized rubber rollers that grip the edges of the filament spool to advance and retract the plastic. Unfortunately, budget filament manufacturers frequently utilize cardboard spools. The cardboard dust coats the rubber rollers, causing them to slip. Furthermore, the cardboard rims deform easily under the pressure of the AMS lid.
When the rollers spin but the spool does not move, the system detects a jam and halts the print. To fix common 3D printing problems in your AMS, you must standardize your inventory. You can either print interlocking plastic rim adapters that snap over the cardboard edges, wrap the edges tightly in electrical tape to provide a smooth, grippy surface, or invest the time to mechanically respool the cardboard inventory onto compatible, reusable plastic spools.
The RFID Profile Tracking Gap
Another frequent user error is simply forgetting to change the slicer profile when manually swapping filament types (e.g., leaving a PLA profile active while loading PETG). Modern closed ecosystems utilize proprietary RFID tags inside the spool to auto-detect the material. However, until an open-source RFID variant is widely adopted by third-party slicers like OrcaSlicer, operators must implement strict manual tracking protocols to avoid catastrophic nozzle jams caused by incorrect temperature profiles.
A technical demonstration of applying plastic rim adapters to a cardboard filament spool for AMS compatibility.
4. Hotend and Extrusion Hardware Failures
The toolhead is the beating heart of your 3D printer. It is subjected to extreme thermal fluctuations, rapid mechanical accelerations, and constant abrasive wear.
PETG-CF Carbonization and Nozzle Buildup
Printing with Carbon Fiber-infused PETG (PETG-CF) is highly desirable for structural parts, but it is incredibly sticky. During long production runs, microscopic amounts of molten PETG cling to the outside of the brass or steel nozzle. Over hours of printing, this accumulation cooks and carbonizes into a hard, black mass. Eventually, a chunk of this burnt plastic breaks off and embeds itself into your clean print, ruining the aesthetic.
To mitigate this, you must install a high-quality silicone sock over the heater block, exposing only the very tip of the nozzle. Furthermore, adding a custom G-code macro that instructs the toolhead to wipe itself across a mounted brass wire brush every 50 layers ensures the nozzle remains completely free of debris.
Volumetric Flow Rate Limitations (The PETG Speed Issue)
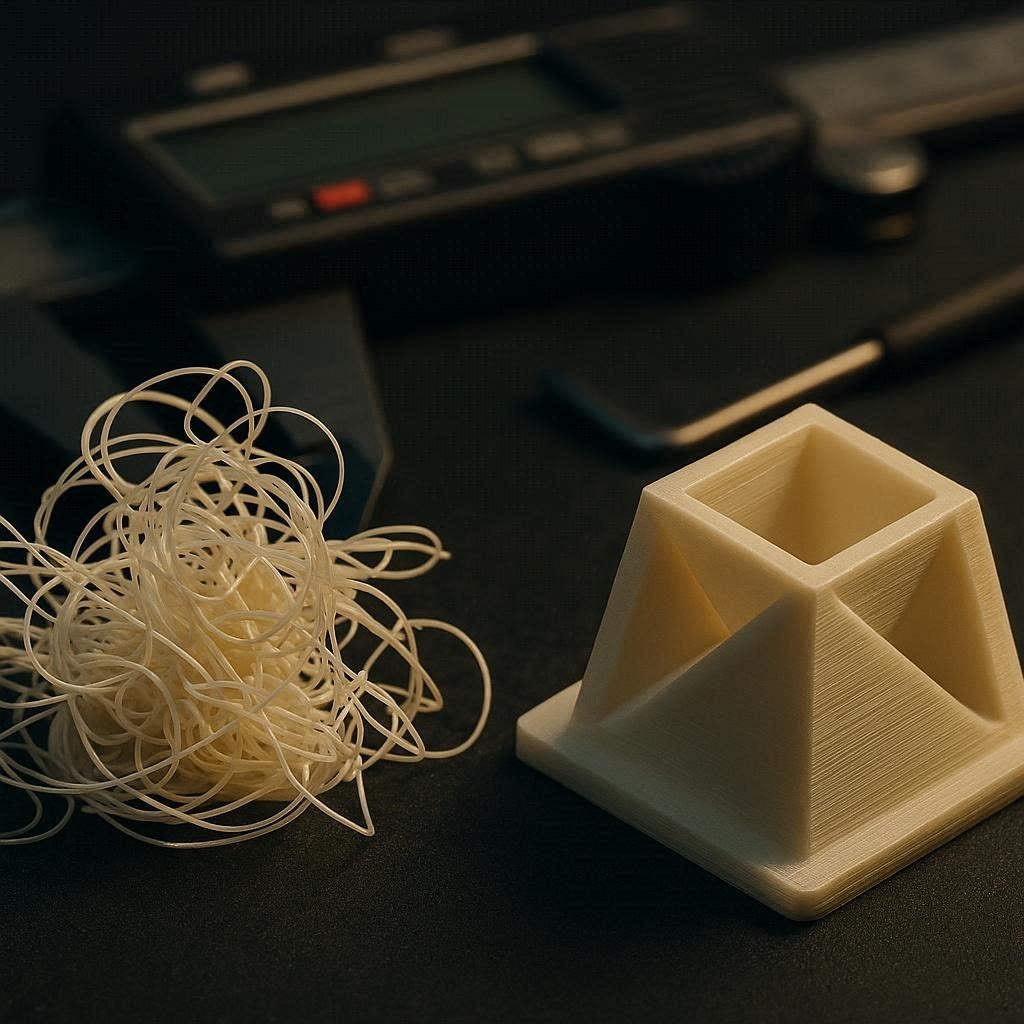
A common complaint among users upgrading to modern high-speed printers is that PETG prints poorly compared to PLA. This is a volumetric flow limit issue. PETG has a much higher viscosity than PLA. While a stock hotend might successfully melt and push PLA at 24 mm³/s, that same hotend will struggle to melt PETG faster than 12 mm³/s. If you push PETG too fast, the extruder gears will skip, resulting in severe under-extrusion. You must explicitly calibrate the maximum volumetric flow rate for every specific brand of PETG you utilize.
Purge Chute (Poop Chute) Clogs
During multi-color prints, the toolhead frequently travels to a designated waste chute to purge the transition colors. On extremely long prints, these purged plastic pellets (often called “poops”) can pile up. If the chute geometry is poor, or if static electricity causes the pellets to cling to the plastic walls, the chute will back up entirely. The waste filament will eventually block the toolhead, causing layer shifts or fatal crashes. Treating the chute with an anti-static spray and monitoring the waste bin capacity on prints exceeding 24 hours is mandatory.
[INTERNAL LINK: Placeholder for “How to Calibrate Volumetric Flow Rates in OrcaSlicer”]
5. Kinematic and Z-Axis Discrepancies
If your extrusion is perfectly calibrated but your models exhibit horizontal banding, squished layers, or dimensional inaccuracies on the vertical axis, you are facing kinematic failures.
Z-Binding and Lead Screw Misalignment
Z-binding is the bane of Cartesian and CoreXY printers alike. It occurs when the threaded rods (lead screws) that lift the X-axis gantry are not perfectly straight, or when the brass anti-backlash nuts are overly tightened. As the motor turns the bent screw, it introduces a microscopic wobble. This wobble physically pushes the toolhead left and right, resulting in highly visible, repeating horizontal lines across the walls of your print.
To diagnose this, you must loosen the screws securing the brass lead nuts to the gantry, allowing them a millimeter of horizontal play. Clean the lead screws thoroughly with a degreaser and re-apply a premium PTFE-based synthetic grease.
Managing Z-Offset Drift on Eddy Current Probes
Advanced users running Klipper firmware frequently upgrade to highly sensitive Eddy Current probes (like the Beacon 3D) for instantaneous bed meshing. However, these magnetic sensors are incredibly sensitive to ambient thermal fluctuations. Over the course of several months, the baseline readings can experience micro-drifts, altering your perfect Z-offset.
If you notice your first layers slowly degrading over time, do not blindly adjust the slicer flow rate. You must perform a complete cold-and-hot recalibration of the probe’s offset every 60 days to maintain 99% uptime flawless execution.
[EXTERNAL LINK: Official Klipper Documentation on Probe Calibration and Thermal Drift]
6. The Permanent Fix: Premium Upgrades (Monetization Section)
While adjusting slicer settings and performing manual maintenance will mitigate many issues, software cannot permanently overcome cheap engineering. If you find yourself constantly battling your machine, you must upgrade your foundational assets. Investing in industrial-grade components from trusted, non-Amazon networks ensures that you fix common 3D printing problems permanently.
1. Eliminate Moisture Variables with Active Dehydration Hygroscopic expansion (wet filament) is responsible for 80% of stringing and internal pressure clogs. A passive plastic tub with silica gel is insufficient. You must invest in an active, heated filament desiccation system. High-end units like the Sunlu S4 allow you to actively heat and circulate dry air around multiple spools simultaneously. Maintaining your engineering polymers at a constant 15% relative humidity completely stabilizes your extrusion flow. You can source premium active dry boxes directly through the MatterHackers affiliate portal.
2. Upgrade to CHT (Core Heating Technology) Nozzles If you are struggling with the low volumetric flow rates of PETG or ABS, a standard brass nozzle is your bottleneck. Upgrading to an aftermarket CHT nozzle physically splits the filament into three internal flow paths inside the melt zone. This exponentially increases surface area contact, drastically improving melt rates. By upgrading your hotend architecture via ShareASale partner brands like Bondtech, you can push high-temperature materials at PLA speeds without extruder clicking.
3. Premium Dimensional Filament If you are buying the cheapest, white-label filament on the market, you are buying dimensional inconsistency. A spool that fluctuates between 1.71mm and 1.79mm will cause rampant over- and under-extrusion artifacts. Upgrading to premium, strictly toleranced materials like Polymaker or Prusament guarantees a strict ±0.02mm diameter. Better raw chemistry equals less downtime.
7. Preventative Maintenance Checklist to Fix Common 3D Printing Problems
To maintain your flawless print quality and ensure your hardware investments last, implement this strict preventative maintenance protocol every 150 hours of active printing:
- Scrub the Build Plate: Wash your PEI sheets with hot water and dish soap. Never touch the print area with your bare hands.
- Clear the Extruder Gears: Open your direct-drive toolhead housing and use a stiff nylon brush to sweep out accumulated filament dust. Dust buildup causes the drive gears to slip during critical retractions.
- Check Lead Screw Lubrication: Wipe down the Z-axis lead screws with a lint-free cloth and reapply a thin coat of PTFE synthetic grease.
- Inspect PTFE Tubes: The reverse-Bowden tubes guiding filament from your AMS to the toolhead wear out over time. If the internal diameter becomes scored or cloudy, friction will increase, leading to extruder clogs. Replace with high-tolerance Capricorn tubing.
- Perform a Nylon Cold Pull: Extract carbonized debris from your nozzle walls by heating the hotend, inserting a strand of cleaning nylon, letting it cool, and forcefully pulling it out.
By treating your 3D printer as a high-precision manufacturing asset and adhering to these technical workflows, you will eliminate the guesswork and drastically increase your operational yield.