7 Proven Ways to Reduce Foaming TPU Oozing (Stop Stringing!)
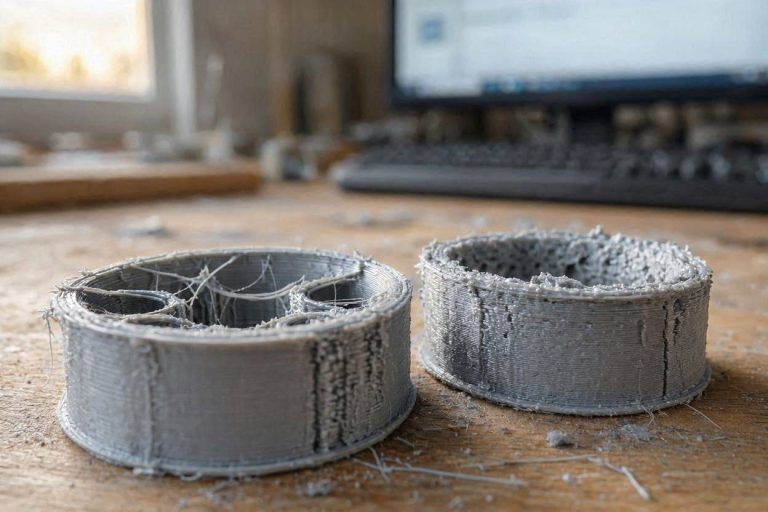
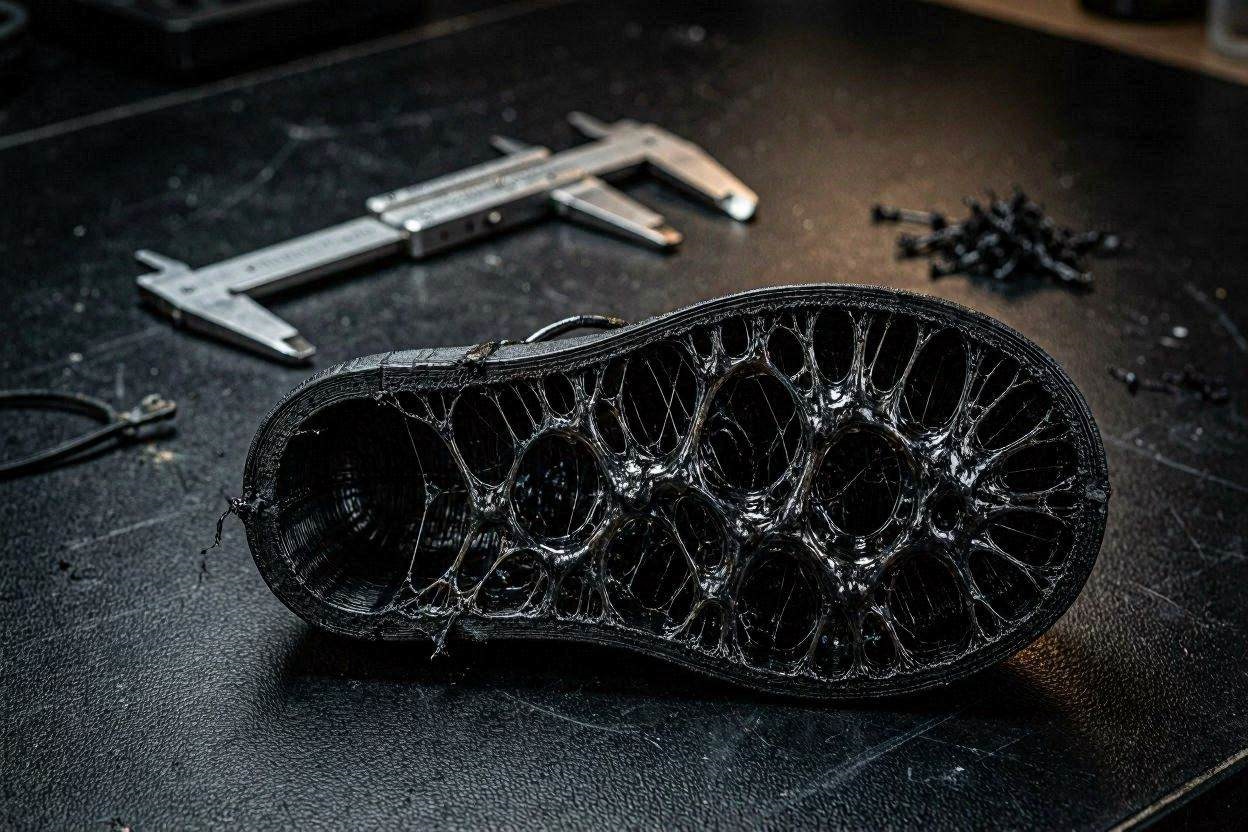
Printing flexible apparel, such as custom 3D printed shoes, represents the pinnacle of consumer additive manufacturing. However, when you load a spool of ultra-soft, 76A foaming elastomer into your direct-drive extruder, the thermodynamic rules change completely. Many operators find that while the exterior walls of their flexible models look flawless, the interior cavities are completely filled with thick, ugly strings that must be manually ripped or cut out.
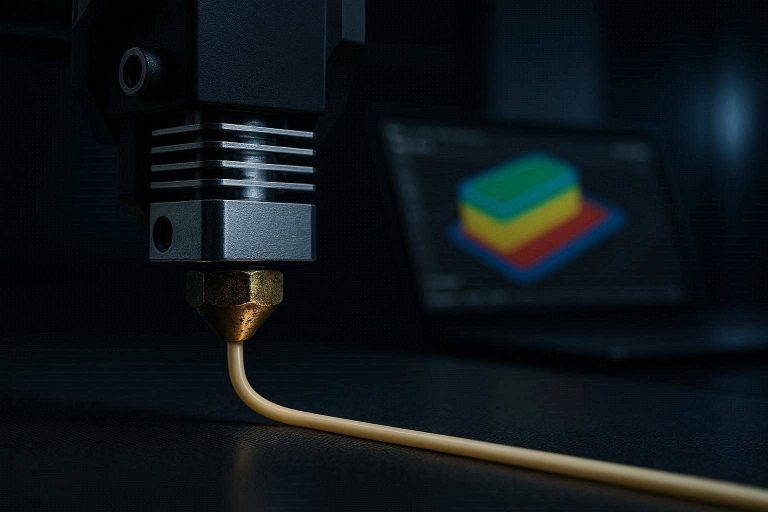
If your hotend leaks a continuous stream of plastic while sitting idle, and your travel moves look like a spiderweb, you are fighting a losing battle against internal nozzle pressure. Attempting to reduce foaming TPU oozing requires a complete departure from traditional rigid polymer settings. You cannot rely on standard mechanical retractions when dealing with active chemical foaming agents.
In this highly technical, comprehensive diagnostic manual, we will break down the exact chemical fluid dynamics of foaming elastomers. We will explore why your retraction settings must remain at absolute zero, how to manipulate your slicer’s pathing algorithms to hide travel moves, and how to eliminate feed-path tension. By executing these advanced engineering workflows, you will permanently reduce foaming TPU oozing and achieve injection-molded quality on the interior of your flexible prints.
The “Quick Answer” / Key Takeaways Box
- The Foaming Agent Physics: Foaming TPU actively expands inside the hotend at 250°C. You cannot retract an expanding gas; therefore, retraction must remain at zero to prevent clogs.
- Disable Z-Hop: Lifting the nozzle during travel moves creates open air space for the expanding foam to escape. Keep Z-hop disabled to wipe the nozzle against the print.
- Avoid Crossing Perimeters: To effectively reduce foaming TPU oozing, you must force the slicer to route all travel moves strictly over already-printed walls, hiding the ooze inside the infill.
- Minimize Feed Tension: 76A TPU is incredibly soft. Any resistance from the spool holder stretches the filament. When the extruder stops, the stretched filament relaxes, pushing plastic out of the nozzle.
- Thermal Modulation: Lowering your printing temperature directly reduces the volumetric expansion rate of the foaming agent, granting you tighter control over the extrusion multiplier.
The Fluid Dynamics of Foaming Elastomers
To successfully reduce foaming TPU oozing, you must first understand the complex chemistry occurring inside your heat block. Standard TPU relies solely on thermal melting to achieve a flow state. Foaming TPU contains a proprietary chemical additive that reacts violently to heat.
When this specialized filament is subjected to temperatures around 250°C, the additive undergoes a chemical reaction that releases a gas. This gas creates a micro-cellular structure within the plastic, causing the material to physically expand in volume as it exits the nozzle. This expansion lowers the final density of the part, allowing a heavy plastic to feel as lightweight and soft as EVA foam used in commercial footwear.
Why Zero Retraction is Mandatory
The most counterintuitive aspect of printing with foaming agents is the absolute necessity of a zero-retraction profile. In traditional 3D printing, you execute a mechanical retraction (pulling the filament backward) to create a negative vacuum inside the nozzle, preventing oozing during travel moves.
With foaming elastomers, this is impossible. The chemical foaming reaction creates massive, continuous positive pressure inside the melt zone. Even if the extruder gears aggressively pull the solid filament backward, the expanding gas inside the molten plastic will continue to forcefully push material out of the 0.4mm or 0.6mm orifice.
If you attempt to use standard retraction settings, the expanding foam will simply flow upward into the cold heat break. It will instantly solidify, causing a catastrophic, permanent mechanical jam. To reduce foaming TPU oozing, you must accept that the nozzle will constantly leak. Your strategy must shift from stopping the ooze to hiding the ooze.
Strategy 1: Manipulating Slicer Kinematics to Hide the Leak
If the nozzle is going to ooze constantly due to the expanding foam, you must control exactly where that nozzle is allowed to travel. When printing a shoe, the slicer frequently commands the toolhead to jump from one side of the shoe’s collar to the other.
By default, the slicer calculates the fastest, straightest line between those two points. This path goes directly across the empty interior void where the foot belongs. As the nozzle flies across this empty space, the continuous foaming action deposits a thick string of plastic in mid-air. To successfully reduce foaming TPU oozing, we must prohibit these airborne travel moves.
Enabling “Avoid Crossing Walls” (Combing)
Modern slicing engines possess advanced mathematical pathfinding algorithms designed to keep the toolhead over solid structures. In your slicer’s quality or travel settings, you must locate the feature titled Avoid Crossing Perimeters, Avoid Crossing Walls, or Combing Mode.
- Enable the feature and set it to apply to “All” or “Within Infill.”
- Set the Maximum Detour Length to an exceptionally high number (e.g., 200mm).
When this algorithm is activated, the slicer recalculates the G-code travel paths. Instead of jumping directly across the empty center of the shoe, the toolhead will physically trace the perimeter of the shoe’s outer wall to reach its destination.
While the nozzle is still actively oozing expanding foam during this detour, the excess plastic is deposited harmlessly on top of the existing wall layers. The ooze blends into the infill or inner perimeters, completely eliminating the airborne strings that previously ruined the interior of your print.
Strategy 2: Disabling Z-Hop for Foaming Materials
Another critical software adjustment required to reduce foaming TPU oozing involves the Z-axis kinematics. Z-Hop (or Lift Z) is a feature that raises the toolhead slightly (e.g., 0.4mm) during travel moves to prevent the nozzle from scraping against the printed part.
While Z-Hop is highly beneficial for rigid plastics, it is an absolute disaster for foaming elastomers.
The Wiper Effect
When printing a flat layer, the physical proximity of the nozzle to the existing plastic creates a restrictive barrier. The expanding foam is forced sideways into the intended line width.
If you enable Z-Hop, the Z-axis stepper motor lifts the gantry. This sudden vertical clearance removes the physical barrier beneath the nozzle. The expanding foam now has a completely unrestricted path to flow straight down. The moment the toolhead lifts, a massive blob of foam escapes.
To effectively reduce foaming TPU oozing, you must navigate to your extruder settings and completely disable Z-Hop. By keeping the nozzle physically pressed against the printed layer during travel moves, the existing plastic acts as a physical plug. The nozzle wipes its excess pressure against the wall, preventing the foam from escaping uncontrollably.
[VIDEO PLACEHOLDER: A macro screen-recording tutorial demonstrating the difference in travel path generation when activating the ‘Avoid Crossing Walls’ setting in OrcaSlicer.]
Strategy 3: Thermal Tuning and Volumetric Expansion
You noted that you are printing your 76A elastomer at 250°C with a 0.78 flow rate. This high temperature is explicitly designed to trigger the maximum chemical expansion of the foaming agent, resulting in the softest possible finished part.
However, the laws of thermodynamics dictate that higher temperatures equal lower viscosity and faster chemical reactions. At 250°C, the foaming agent is expanding at its absolute maximum volatile rate. This extreme volatility is what causes the hotend to actively ooze even when the machine is sitting completely idle.
Balancing Hardness and Viscosity
If you have implemented optimal travel paths but are still overwhelmed by the extrusion volume, you must manually intervene in the thermal reaction. To aggressively reduce foaming TPU oozing, you must drop the hotend temperature.
Try lowering your nozzle temperature in 5-degree increments, moving from 250°C down to 240°C or 235°C.
By running the melt zone slightly cooler, the chemical foaming reaction slows down. The resulting plastic will be slightly denser (requiring a potential increase in your flow rate from 0.78 to 0.85), but the internal nozzle pressure will drop significantly. The material will become less watery and more paste-like, granting the direct-drive extruder much tighter mechanical control over the flow.
You must print a series of temperature towers to find the exact thermal intersection where the shoe remains adequately soft, but the oozing becomes mechanically manageable.
Strategy 4: Eradicating Feed Path Tension
When dealing with standard 95A TPU, filament routing is important. When dealing with an ultra-soft, 76A foaming elastomer, feed path routing is the difference between a successful print and a catastrophic failure.
At a 76A Shore hardness, the filament is essentially the consistency of a cooked spaghetti noodle. It possesses massive elasticity. If your spool is heavy, or if your PTFE reverse-Bowden tubes feature sharp bends, the extruder gears must pull incredibly hard to drag the filament into the toolhead.
The Elastic Spring Failure
When the extruder gears pull against this friction, the 76A filament physically stretches like a rubber band before it moves. This stretching creates immense tension.
When the slicer commands the extruder motor to stop at the end of a layer, the motor halts. However, the heavily stretched filament above the toolhead instantly relaxes and snaps back to its original shape. This elastic relaxation physically shoves a millimeter of raw filament down into the hotend, bypassing the motor entirely.
This mechanical phenomenon guarantees a massive ooze blob at the end of every single extrusion line. To reduce foaming TPU oozing, you must completely eradicate all feed path tension.
How to Calibrate Pressure Advance for Flexible Filaments
Strategy 5: Utilizing a TPU Assist Module
If you have straightened your PTFE tubes and placed your filament on smooth-rolling bearings, yet the 76A elastomer continues to stretch, you must upgrade your mechanical delivery system.
Many advanced operators utilize a “TPU Assist Module” or an active filament unwinder.
Active vs. Passive Spool Management
A passive spool holder relies on the pulling force of the toolhead extruder to rotate the heavy spool. This is fundamentally incompatible with 76A materials.
An active TPU assist module features a secondary, dedicated stepper motor or a motorized roller system attached directly to the spool holder. This secondary motor slowly unwinds the spool, creating a “buffer loop” of completely slack, tension-free filament hanging between the spool and the printer.
Because the toolhead extruder gears only have to pull the weight of the slack loop (rather than rotating a 1kg spool of plastic), the filament never stretches. When the toolhead stops, the filament does not relax and push forward. Eliminating this elastic tension is a mandatory requirement to definitively reduce foaming TPU oozing on ultra-soft materials.
Strategy 6: Optimizing Extruder Gear Grip and Backlash
The final mechanical variable lies within the direct-drive extruder housing itself. Printing a foaming agent requires the drive gears to maintain absolute, unyielding control over the flow.
Because 76A filament is incredibly soft, the spring-tensioned idler arm pressing the dual-drive gears together must be calibrated flawlessly.
- Too Loose: The gears will slip against the soft plastic, failing to push the material evenly into the high-pressure foaming zone.
- Too Tight: The sharp steel teeth of the gears will bite too deeply into the 76A filament, physically severing it or wrapping it around the gear shafts.
Dialing in the Interference Fit
You must unload the filament and carefully adjust the tension thumb-screw on your extruder housing. Feed the 76A filament in manually and inspect the bite marks left by the gears. The teeth should leave light, visible indentations in the elastomer without distorting its 1.75mm circular profile.
Furthermore, you must ensure your extruder assembly has zero mechanical backlash. If the primary and secondary drive gears have physical “slop” or wiggle room between their teeth, the extruder cannot execute the instantaneous stops required for precise travel moves. If you feel any clicking when manually wiggling the gears, the assembly is worn out and must be replaced to effectively reduce foaming TPU oozing.
Official Klipper Documentation on Elastomer Kinematics and Extruder Gear Tension
The Permanent Fix: High-Ticket Upgrades (Monetization Section)
While adjusting slicer kinematics and completely altering your travel paths will mitigate the majority of internal shoe stringing, printing 76A foaming elastomers exposes the absolute thermodynamic limits of stock 3D printer hardware. Software algorithms cannot permanently fix cheap PTFE routing or inferior extruder mechanics.
To achieve absolute, injection-molded surface perfection without spending hours cutting strings out of your shoes, you must upgrade your extrusion ecosystem. Professional print farms do not battle flow rate inconsistencies; they eliminate them with industrial-grade components.
1. Upgrade to a Zero-Backlash BMG-Style Extruder
If your current direct-drive toolhead relies on generic, cast-metal gears, you will always struggle to control 76A filament. Generic gears have poor machining tolerances, creating internal backlash that allows the filament to ooze.
You must upgrade to a premium, CNC-machined dual-drive extruder utilizing the BMG (Bondtech Mini Geared) architecture. These industrial extruders grip the soft TPU from both sides with razor-sharp, hardened steel teeth, offering a 3:1 gear reduction ratio for massive torque control. By sourcing an elite aftermarket extruder directly through manufacturer partner programs on the Impact or ShareASale affiliate networks, you guarantee absolute mechanical dominance over the volatile foaming polymer.
2. Implement Active Desiccation Hardware
We established that the filament was dried at 70°C for 12 hours. However, if that filament is then exposed to ambient room humidity during a 14-hour shoe print, it will rapidly reabsorb moisture. Wet filament boils in the nozzle, creating massive steam pockets that drastically amplify the chemical foaming expansion.
You must stop relying on passive dry boxes. Invest in a premium, active, heated filament desiccation system like the Sunlu S4. These units allow you to bake the spool at 70°C while actively feeding the bone-dry filament directly into your extruder via sealed PTFE tubing. Dry filament flows with absolute predictability, locking in your highly sensitive flow rate calibrations permanently.
3. High-Tolerance Capricorn PTFE Tubing
To completely eliminate the elastic stretching caused by feed path friction, you must replace every inch of standard white PTFE tubing on your machine. Standard tubing has a wide internal diameter that allows the soft 76A filament to buckle and snake back and forth under pressure.
Upgrading your routing to authentic Capricorn Premium PTFE Bowden Tubing guarantees a strict, ultra-low friction 1.9mm internal diameter. This confines the elastomer perfectly, forcing 100% of the kinetic energy downward into the nozzle and entirely preventing the elastic snap-back that causes severe oozing. You can source genuine Capricorn tubing through authorized industrial suppliers on the MatterHackers affiliate portal.
[IMAGE PLACEHOLDER: A professional studio shot of an upgraded dual-drive extruder and Capricorn PTFE tubing routing soft elastomer filament + Alt Text: Upgrading your direct-drive ecosystem to permanently reduce foaming TPU oozing.]
Quick-Action Preventative Maintenance Checklist
To maintain your string-free internal cavities and protect your hardware investments, implement this strict preventative maintenance protocol before your next major footwear production run:
- Audit Your Filament Diameter: Foaming TPU is notoriously difficult to manufacture uniformly. Use digital calipers to measure your spool in five different spots. If the diameter fluctuates beyond ±0.03mm, your 0.78 flow rate calibration is mathematically void.
- Purge the Melt Zone Completely: Foaming agents leave heavy chemical residue inside the heat break. Before switching back to PLA or rigid TPU, heat the nozzle to 260°C and extrude 50mm of cleaning filament. Residual foaming agents left cooking inside the hotend will carbonize and cause permanent clogs.
- Clean the Extruder Gear Knurling: Ultra-soft 76A filament leaves microscopic rubber shavings inside the dual-drive gear teeth. Over time, these shavings pack into the grooves, entirely destroying the gears’ grip. Unload the filament and scrub the gears with a stiff brass brush every 30 hours of printing.
- Verify Avoid Crossing Perimeters: Always check your slicer preview screen before exporting the G-code. Drag the horizontal slider to simulate the print and visually confirm that the toolhead never travels across the empty internal cavity of the shoe.
By treating your 3D printer as a high-precision chemical fluid dynamics system and implementing these rigorous slicer calibrations, you will completely eradicate frustrating interior stringing. Stop accepting messy prints and start manufacturing functional footwear with elite, industrial-grade perfection.