9 Proven Fixes for Ender 3 V3 KE Blobbing and Inconsistent Layers (Stop Failures!)
Upgrading a high-speed “bed slinger” 3D printer is supposed to improve print quality, not destroy it. If you have recently installed a Y-axis linear rail modification on your machine, only to be greeted by severe Ender 3 V3 KE blobbing and inconsistent layers, you are experiencing a complex collision of mechanical binding and thermodynamic limits.
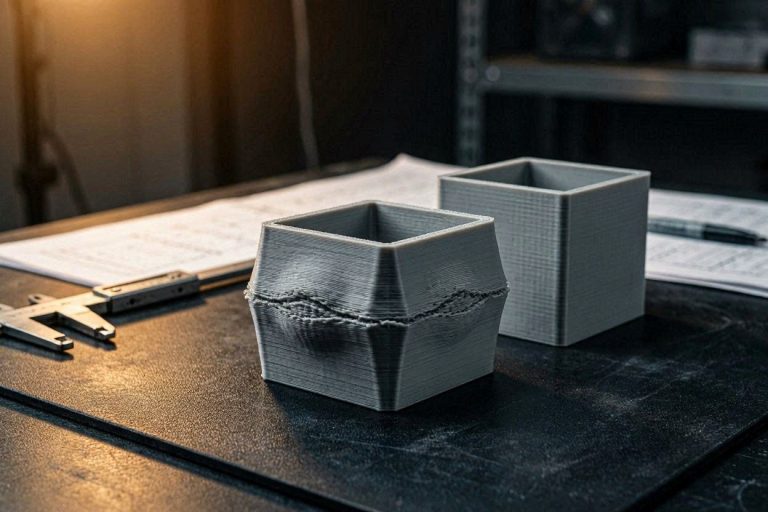
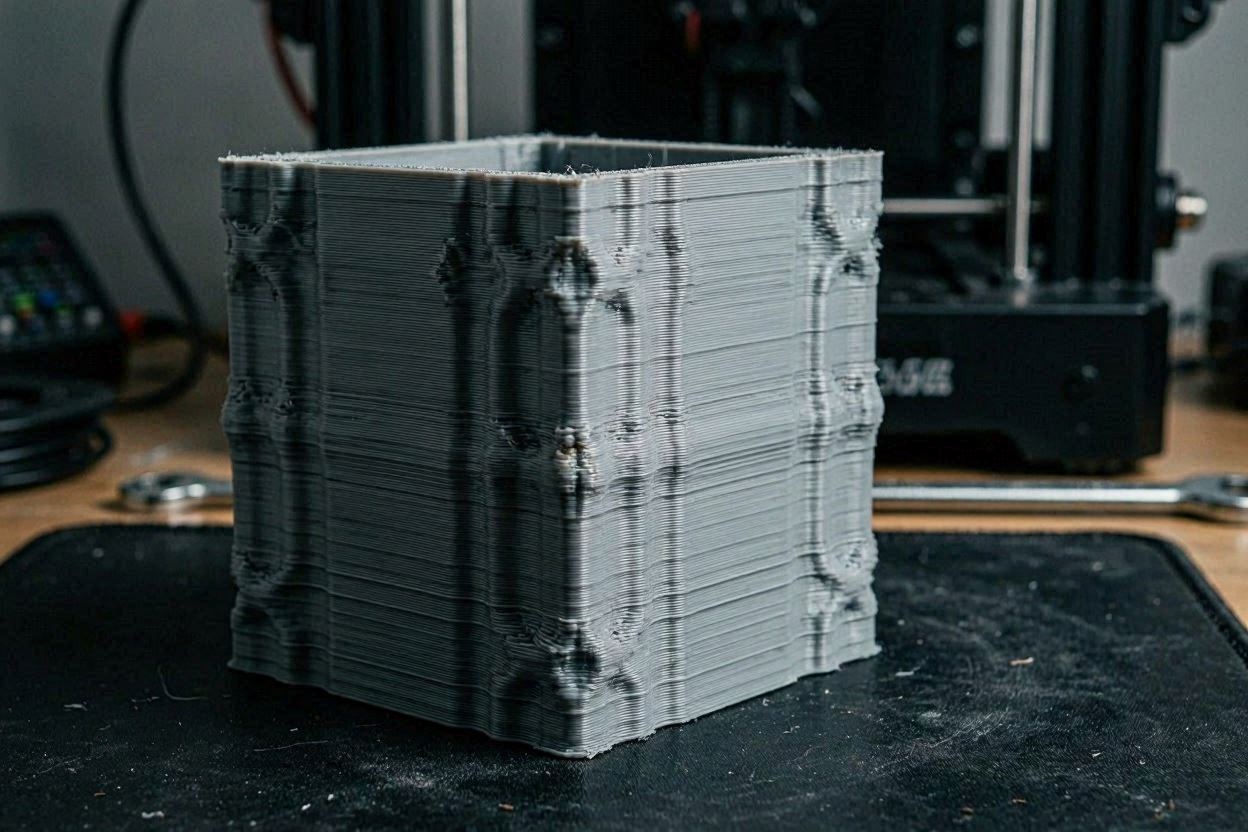
It is incredibly frustrating to watch a simple Z-wobble test tower fail after spending hours calibrating. When you observe severe blobbing on exactly three corners while the fourth remains pristine, and your straight walls exhibit visible horizontal shifting, the issue goes far beyond basic belt tension. You have tightened your grub screws, lubricated your rails, and tuned your OrcaSlicer 2.4.0 settings, yet the machine still stutters and over-extrudes.
In this highly technical, comprehensive diagnostic manual, we will break down the exact kinematics and physics causing your modified machine to fail. We will explore the hidden mechanical friction in over-constrained dual linear rail setups, the volumetric flow bottlenecks of the Creality Unicorn hotend, and the specific OrcaSlicer cornering algorithms that cause asymmetrical blobbing. By executing these exactly 9 proven engineering workflows, you will permanently eradicate these artifacts.
The “Quick Answer” / Key Takeaways Box
- The Linear Rail Trap: Inconsistent layers immediately following a rail mod indicate kinematic micro-binding. If dual Y-axis rails are misaligned by a fraction of a millimeter, the stepper motor drops micro-steps, shifting the layers.
- The Asymmetrical Blobbing Clue: Blobbing on three corners but not the fourth is a classic Z-seam artifact in OrcaSlicer. The clean corner is where the internal nozzle pressure resets during a retraction.
- The Volumetric Bottleneck: Printing at 300 mm/s with 0.2mm layer heights demands a massive 25.2 mm³/s of volumetric flow. At 215°C, PLA+ remains highly viscous, causing massive pressure surges at every corner.
- Kinematic Deflection: Pushing a heavy, rail-modded Y-axis bed to 4,000 mm/s² acceleration causes immense resonance and frame deflection, manifesting as wavy, inconsistent vertical layers.
Fix 1: Parallel Realignment of the Dual Y-Axis Linear Rails
Whenever you modify the kinematics of an electromechanical system and immediately experience layer shifting, the modification is the primary suspect. Upgrading from standard V-slot rubber rollers to MGN12 or MGN9 linear rails is a massive structural change. While rails provide incredible rigidity, they are entirely unforgiving of geometric misalignment.
Rubber V-rollers can flex and absorb slight bends in an aluminum extrusion. Hardened steel linear rails cannot. If your two Y-axis rails are not perfectly parallel down to the micrometer, the system becomes over-constrained. The carriage blocks will physically bind against the steel tracks as the bed travels back and forth.
When the Y-axis stepper motor attempts to push the bed through a localized binding spot, it faces a sudden spike in torque resistance. If this resistance exceeds the current limit of the TMC2209 stepper driver, the motor drops a micro-step. The printer’s motherboard does not recognize this skipped step and continues sending G-code coordinates. Consequently, the next layer of plastic is deposited slightly offset, resulting in the wavy lines that characterize Ender 3 V3 KE blobbing and inconsistent layers.
To eliminate this kinematic binding, you must completely realign your Y-axis. Loosen the screws securing one of the two linear rails (the “slave” rail) to the extrusion, leaving the “master” rail fully tightened. Next, loosen the screws securing the heated bed carriage plate to the blocks. Move the heated bed manually back and forth along the Y-axis twenty times. The loose rail will naturally force itself into a perfectly parallel alignment. Gradually tighten the slave rail screws, followed by the carriage plate, to lock in a frictionless glide path.
Fix 2: Calibrating Maximum Volumetric Flow Limits
You are attempting to print PLA+ at 300 mm/s for inner walls, utilizing a 0.2mm layer height and a 0.4mm nozzle. To understand why your corners are failing, we must calculate the thermodynamic demand you are placing on the Creality Unicorn high-flow hotend.
Volumetric Flow Rate (VFR) is the absolute measure of how much plastic your hotend must melt per second. The formula is: Line Width × Layer Height × Print Speed. Assuming a standard 0.42mm line width, your inner walls demand 0.42×0.2×300=25.2 mm3/s.
A flow rate of 25.2 mm³/s is blisteringly fast. While the Unicorn hotend features an extended melt zone, sustaining 25+ mm³/s requires an immense amount of continuous thermal energy. The stock 60W heater cartridge simply cannot keep up with this volume of cold material entering the chamber.
When the plastic cannot melt fast enough, it acts as a physical blockage. The direct-drive extruder must apply massive torque to force the semi-solid polymer through the nozzle, creating a massive pressure backup. Navigate to your filament profile in OrcaSlicer and enable the Volumetric speed limitation. Hard-cap your maximum volumetric speed to 18 mm³/s. This forces the slicer to autonomously throttle the toolhead speed during long straightaways, preventing the pressure spikes that cause corner blobbing.
Fix 3: Modulating Hotend Temperature for High-Speed Viscosity
You noted that you are printing Matter3D PLA+ at 215°C. At standard speeds (50-100 mm/s), 215°C is an ideal temperature. However, fluid dynamics change radically at 300 mm/s.
When filament rushes through the heat block at extreme velocities, it spends less time in contact with the hot brass or copper walls. The outer shell of the filament melts, but the core of the 1.75mm strand remains highly viscous. PLA+ contains proprietary elastomers and impact modifiers that make it even thicker and more resistant to shearing forces than standard PLA.
Because the plastic is too cold and viscous to flow freely, the extruder builds up immense internal pressure during a straight 300 mm/s movement. When the toolhead reaches a 90-degree corner, it must instantly decelerate. The extruder motor stops pushing, but the highly compressed, viscous plastic acts like a coiled spring. It surges out of the nozzle tip uncontrollably while the toolhead is stationary at the apex of the corner.
To solve this specific cause of Ender 3 V3 KE blobbing and inconsistent layers, you must drastically reduce the dynamic viscosity of the polymer. Raise your nozzle temperature from 215°C to 225°C or even 235°C. Injecting more thermal energy into the melt zone liquefies the PLA+ much faster, dropping the internal pressure and allowing the plastic to stop flowing the exact millisecond the extruder motor halts.
[IMAGE PLACEHOLDER: A cross-section technical diagram of the Creality Unicorn hotend showing internal pressure buildup and cold-core filament at high speeds + Alt Text: An engineering diagram explaining why volumetric pressure causes Ender 3 V3 KE blobbing and inconsistent layers.]
Fix 4: Tuning High-Velocity Pressure Advance in Klipper
You mentioned that you have already tuned your Pressure Advance (PA) and flow ratio. However, running a standard PA calibration line test at 100 mm/s is entirely inadequate for a machine printing at 300 mm/s.
Pressure Advance is a predictive algorithm in Klipper. It commands the extruder motor to pull the filament back slightly before the toolhead decelerates for a corner. The goal is to perfectly offset the internal nozzle pressure. However, the physical pressure curve of molten plastic changes exponentially as velocity increases. A K-value that perfectly sharpens a corner at 100 mm/s will completely fail to contain the pressure surge at 300 mm/s.
You must run the OrcaSlicer Pressure Advance Tower Test specifically capped at your target printing speed of 300 mm/s.
Furthermore, you must adjust the smooth_time variable in your Klipper printer.cfg. By default, this is often set to 0.040. This high smoothing value blunts the aggressiveness of the extruder’s micro-retractions. Drop the smooth_time to 0.020. This forces the extruder to react with much sharper, faster movements, effectively snapping the pressure curve shut before the blob can form at the corner apex.
Fix 5: Restructuring the Wall Loop Printing Order
The way your slicer calculates the sequence of extrusion paths plays a massive role in geometric accuracy. If you are experiencing bulging corners, your wall printing order is likely exacerbating the internal pressure of the print.
By default, many OrcaSlicer profiles are set to print “Inner/Outer”. This means the toolhead prints the structural internal walls first, and then wraps the visible outer perimeter around them.
When printing at high speeds, pumping hot plastic into the inner walls creates localized lateral pressure. The hot plastic wants to expand. If the inner wall is printed first, it pushes outward. When the outer wall is finally laid down, it has no structural support holding it back, and it tracks directly over the swollen inner plastic, resulting in a visible, bulging defect on the outside of the model.
Navigate to the Quality tab in OrcaSlicer. Change the Wall printing order to Outer/Inner/Infill. By laying down the visible outer shell first, the toolhead prints against open air, guaranteeing absolute dimensional accuracy. Any subsequent pressure surges or over-extrusion from the inner walls or infill are trapped safely inside the model, completely invisible to the naked eye.
[INTERNAL LINK: Placeholder for “How to Calibrate Input Shaping and Klipper Resonance on the Ender 3 V3 KE”]
Fix 6: Attenuating Dynamic Acceleration and Resonance
You are currently commanding your newly modified Y-axis to accelerate at 4,000 mm/s² (4k acceleration). While this looks impressive on a specification sheet, it ignores the mechanical realities of a bed slinger architecture.
The Y-axis stepper motor must physically accelerate the entire mass of the aluminum bed, the magnetic PEI sheet, the steel linear rail blocks, and the printed object itself. When you throw this massive weight back and forth at 4k mm/s², the sudden changes in inertia cause the entire frame of the printer to violently flex.
This mechanical deflection travels straight up the Z-axis extrusions and vibrates the toolhead. This vibration manifests in your prints as wavy, repeating patterns on the flat walls (often called ghosting, ringing, or VFA). This resonance completely ruins dimensional accuracy and is a major contributor to Ender 3 V3 KE blobbing and inconsistent layers.
To stabilize the frame and smooth out your walls, you must lower your dynamic kinematic limits to act as a mechanical low-pass filter. Navigate to the Speed tab in OrcaSlicer. Drop your Outer Wall acceleration from 3,000 mm/s² down to 1,500 mm/s². Drop your Inner Wall and Infill acceleration down to 2,500 mm/s². This targeted reduction will barely impact your overall print time, but it will drastically reduce the violent frame deflection.
Fix 7: Optimizing Z-Seam Wiping and Retraction
The most crucial clue in your diagnostic report is that the blobbing only occurs on three corners of your calibration tower, leaving one corner perfectly unaffected. This proves the issue is not purely mechanical; it is a slicer artifact related to the Z-seam.
A 3D printer must start and stop extrusion at a specific point on every layer. In OrcaSlicer, when the Z-seam alignment is set to “Aligned” or “Back,” the slicer forces this start/stop point to occur on one specific corner. When the toolhead reaches this seam corner, it executes a retraction move. This physical pull-back completely relieves the built-up internal nozzle pressure, allowing this single corner to print perfectly flush.
However, the toolhead whips around the other three continuous corners without retracting. The pressure surges at these three apexes, leaving massive blobs.
To equalize the pressure across all four corners, you must enable Wipe while retracting in your Extruder settings. Set the Wipe Distance to 2mm and the Retract amount before wipe to 15%. This forces the nozzle to wipe inward over the already-printed infill as it slows down, actively bleeding off the residual hotend pressure before the toolhead ever reaches the sharp corner transition.
Fix 8: Eliminating Extruder Drive-Gear Backlash
You noted that you checked your grub screws, which is an excellent diagnostic step. However, you must also ensure the internal gearing of the Creality direct-drive assembly is free from mechanical backlash.
The KE toolhead utilizes a dual-gear extrusion system. The primary gear is driven by the stepper motor, while the secondary gear is turned by the meshing teeth of the primary gear. Mechanical backlash occurs when there is physical “slop” or empty space between these meshing teeth.
When Klipper’s Pressure Advance commands the motor to rapidly reverse direction at a corner, the motor shaft turns instantly, but the gear teeth take a fraction of a second to engage in the opposite direction. This dead-zone completely invalidates your PA tuning, resulting in Ender 3 V3 KE blobbing and inconsistent layers.
Power down the printer. Pinch the large POM extruder gear with your fingers and attempt to wiggle it back and forth. If you feel any clicking, loose movement, or free-play before the stepper motor shaft engages, the gear tolerances are worn out. You must replace the internal gear assembly to restore the zero-backlash precision required for high-speed retraction. Furthermore, ensure the tension spring pressing the gears against the filament is tight enough to prevent slipping, but not so tight that it crushes the PLA+ into an oval shape.
Fix 9: Securing the Creality Unicorn Hotend Fasteners
The final mechanical vulnerability lies within the specific architecture of the Creality Unicorn hotend. This hotend integrates the heat break and the nozzle into a single, bi-metal tube. The entire heater block assembly is secured to the cold heatsink using two long, thin titanium screws.
Because the Ender 3 V3 KE moves violently at high accelerations, thermal cycling and kinematic vibration can cause these two titanium screws to slowly back out over time. If these screws are even slightly loose, the entire heater block will physically swing or wobble by a fraction of a millimeter every time the toolhead changes direction.
When the toolhead slams on the brakes to print a sharp corner, the loose heater block swings forward like a pendulum, depositing a massive blob of plastic exactly at the apex. Remove your silicone sock while the hotend is cold. Using the appropriate hex key, verify that the two retaining fasteners holding the heater block to the heatsink are torqued down securely. Do not over-tighten, as titanium can snap, but ensure there is zero lateral play in the heat block.
[EXTERNAL LINK: Official Klipper Documentation on Advanced Pressure Advance Tuning Metrics]
The Permanent Fix: Premium Upgrades
Software tuning and rigorous lubrication can only mitigate the flaws of budget hardware to a certain extent. If you are serious about achieving professional, injection-molded quality at 300 mm/s, you must replace the structural bottlenecks on your machine. The fastest way to permanently eradicate Ender 3 V3 KE blobbing and inconsistent layers is to invest in industrial-grade components utilized by expert print farms.
Upgrade to Authentic Hiwin Linear Rails
Not all steel is milled equally. Cheap, generic linear rails sourced from Amazon or AliExpress often feature unpolished ball bearings and improperly milled raceways. This results in the exact micro-binding and layer shifting you are experiencing.
To achieve flawless Y-axis kinematics, you must upgrade to authentic Hiwin MGN12H linear rails. Hiwin is the gold standard for precision manufacturing, offering zero-backlash, pre-loaded carriages that glide with microscopic fluidity. You can source genuine Hiwin rails directly from authorized distributors through the MatterHackers or ShareASale affiliate networks. Installing genuine, high-tolerance rails eliminates Y-axis binding instantly.
High-Flow CHT (Core Heating Technology) Nozzles
We established that your stock Creality Unicorn hotend struggles to melt PLA+ at 25.2 mm³/s. Instead of just cranking up the temperature and risking heat creep, you must increase the thermal efficiency of your nozzle architecture.
Upgrading to an aftermarket CHT-style nozzle physically splits the incoming 1.75mm filament into three separate internal channels. This exponentially increases the surface area contact between the hot brass and the plastic core.
By replacing your stock nozzle with a premium CHT variant (available via Impact network partners like Bondtech), you can double your maximum volumetric flow rate. The plastic melts instantaneously into a highly fluid state, eliminating the corner pressure surges and stopping the blobbing dead in its tracks.
Active Filament Desiccation (The Sunlu S4)
Even if your mechanics are flawless, wet filament will destroy your extrusion consistency. PLA+ is highly hygroscopic; it absorbs atmospheric moisture rapidly. When this trapped moisture hits a 225°C hotend, the water instantly flashes into steam. This miniature steam explosion causes violent, unpredictable pressure spikes, resulting in random blobs and zits all over your outer walls.
You must stop storing your filament in plastic bags and invest in an active, heated filament dryer. Premium units like the Sunlu S4 allow you to bake four spools simultaneously at 50°C, feeding the bone-dry filament directly into your direct-drive extruder. Dry filament flows predictably, locking in your precise PA and volumetric flow calibrations permanently.
Preventative Maintenance Checklist
To ensure your newly modified Ender 3 V3 KE remains a precision manufacturing asset, implement this strict preventative maintenance protocol every 150 hours of active print time:
- Audit Y-Axis Belt Tension: Linear rails have less friction than rubber V-rollers, which means loose belts are much more apparent. Ensure your Y-axis belt plucks with a low, audible bass note. Too tight, and you will snap the stepper motor shaft; too loose, and you will suffer severe layer shifts.
- Wipe Down the Steel Rails: Never let dust accumulate on your linear rail tracks. Wipe the steel down weekly with a lint-free cloth and apply a light coat of Super Lube PTFE synthetic grease. Never use WD-40, as it strips the critical bearing grease out of the internal carriage blocks.
- Recalibrate Z-Offset: Modifying the Y-axis carriage plate changes the precise geometric distance between your nozzle and your CR-Touch bed probe. You must completely wipe your saved bed mesh and generate a new high-resolution mesh to prevent first-layer dragging.
- Purge Carbonized Debris: Pushing a high-flow hotend to its extreme thermodynamic limits often leaves burnt plastic residue inside the nozzle chamber. Perform a nylon cold-pull weekly to extract carbonized debris that could alter your internal nozzle pressure dynamics.
By treating your 3D printer as a complex thermodynamic and kinematic system, rather than a plug-and-play appliance, you can systematically eliminate every variable causing your print failures. Lock down your rails, optimize your OrcaSlicer flow limits, and upgrade your thermal bottlenecks to start manufacturing with elite, industrial-grade reliability.