Ender 3 E1 Thermal Runaway Error Fix: 7 Brutal Failures & Total Recovery Guide
Encountering a sudden system halt during a complex 3D print is incredibly frustrating, especially when the LCD screen flashes a terrifying warning. The Ender 3 E1 thermal runaway error fix is the most critical technical workflow a machine operator must master to maintain consistent manufacturing uptime. This specific failure code is not just a minor software glitch; it is a critical safety mechanism designed to prevent catastrophic thermal events.
When your hardware displays the E1 halted message, it means the mainboard has detected a severe discrepancy between the target hotend temperature and the actual physical temperature reading. Executing a proper Ender 3 E1 thermal runaway error fix requires a methodical approach, involving multimeter diagnostics, firmware calibration, and hardware inspection. If you ignore this warning and attempt to bypass the safety protocols, you risk completely destroying your heating block or sparking a severe electrical short.
This comprehensive technical manual will break down the exact parameters of the heating ecosystem. You will learn the precise mechanical tolerances, the electrical resistance values required for stock components, and the step-by-step diagnostic workflow needed to restore your manufacturing pipeline.
The “Quick Answer” / Key Takeaways Box
- Firmware Trigger Thresholds: The E1 error triggers when the hotend temperature drops below the target trajectory for a sustained period, typically crossing the default Marlin hysteresis limit.
- Thermistor Continuity Failures: A broken or aggressively tightened 100k NTC 3950 thermistor wire is the primary culprit behind erratic negative temperature readings.
- Heater Cartridge Resistance: A healthy 24V 40W heater cartridge must measure approximately 14.4 ohms of resistance; anything outside this range indicates an internal short.
- PID Calibration Drift: Swapping nozzles, changing cooling fan ducts, or moving the machine to a colder room requires an immediate Proportional-Integral-Derivative (PID) autotune.
- Motherboard MOSFET Checks: If the hotend begins heating uncontrollably the moment the power supply is turned on, the motherboard MOSFET has blown and requires a full board replacement.
What Causes the Ender 3 E1 Thermal Runaway Error?
Understanding the underlying mechanics of thermal runaway is essential before attempting any physical hardware modifications. The Ender 3 motherboard continuously monitors the hotend via a closed-loop feedback system. It sends electrical current to the heater cartridge while simultaneously reading the resistance from the thermistor to calculate the exact temperature.
When the expected temperature delta does not match the energy output over a specific timeframe, the firmware triggers the E1 halt protocol. This safety net exists because if the thermistor falls out of the heat block, the motherboard would theoretically pump infinite power into the heater cartridge, turning the aluminum block into a fire hazard.
Thermistor Hardware Degradation
The thermistor is the most fragile component on the entire machine. It utilizes a tiny glass bead housing a temperature-sensitive resistor, secured to the aluminum heat block by a single Phillips head screw. Due to the constant mechanical movement of the X-axis carriage, the thin wires leading to the glass bead are subjected to intense mechanical strain.
Over hundreds of printing hours, this continuous flexing can cause micro-fractures within the copper wiring. Furthermore, if the securing screw is over-tightened during routine maintenance, it will immediately crush the Teflon insulation. This causes the wires to short against the grounded aluminum block, resulting in massive temperature reading spikes or complete electrical failure.
Heater Cartridge Lifespan and Power Drops
The heater cartridge is responsible for converting electrical energy into massive amounts of thermal energy. Standard Ender 3 systems operate on a 24V power supply, pushing 40 watts of power into the hotend. Over time, the internal resistive wire within the steel cartridge can degrade, leading to a drop in total power output.
When the cartridge begins to fail, it loses the ability to overcome the cooling effect of the part cooling fan. If the part cooling fan kicks on at 100% speed on the second layer of a print, a weakened heater cartridge will struggle to maintain the target 200°C. Once the temperature dips below the firmware’s acceptable hysteresis range, the system assumes a critical failure and triggers the halt.
Environmental Variables and Silicone Socks
Many operators underestimate the impact of ambient room temperature on thermal stability. Moving the printer into a cold basement or a drafty garage completely alters the thermal dynamics of the hotend. If the ambient temperature is too low, the stock heating elements have to work exponentially harder to maintain stability.
Additionally, the silicone sock that covers the aluminum heat block plays a massive role in thermal insulation. If this sock is torn, missing, or coated in burnt plastic, the heat block is directly exposed to the blast of the part cooling fan. The lack of insulation allows thermal energy to escape faster than the cartridge can replace it, generating an instant thermal runaway condition.
[IMAGE PLACEHOLDER: A close up of an aluminum 3D printer hotend missing its silicone sock, showing burnt filament residue around the nozzle + Alt Text: Inspecting an exposed heat block during an Ender 3 E1 thermal runaway error fix.]
Technical Specifications and Ohm’s Law Parameters
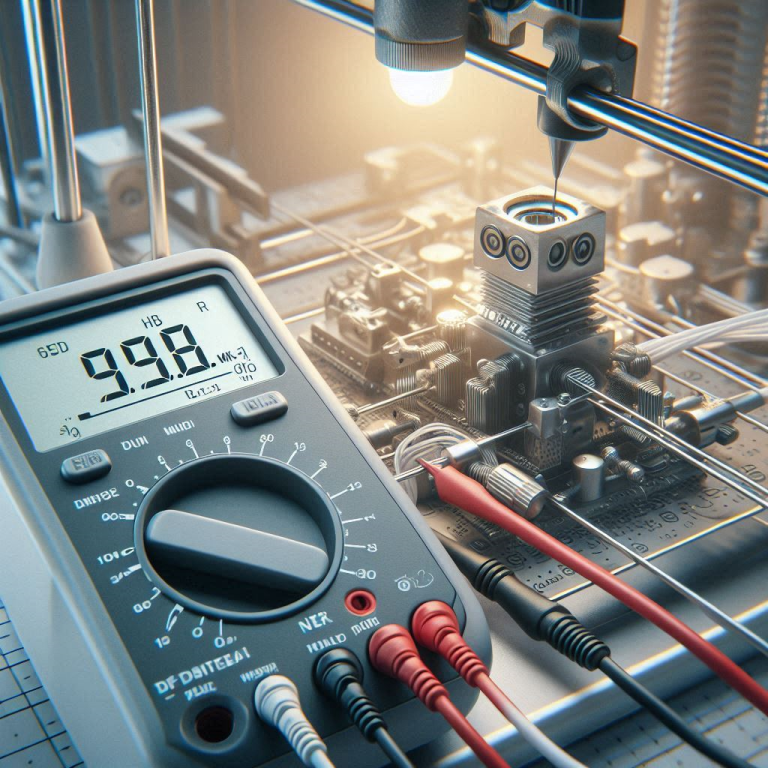
To professionally diagnose an Ender 3 E1 thermal runaway error fix, you must abandon guesswork and rely entirely on raw electrical data. Using a digital multimeter is non-negotiable for this workflow. You will be measuring continuity, direct current voltage (VDC), and resistance (Ohms).
The stock Creality thermistor is an NTC (Negative Temperature Coefficient) 3950. This specific designation means that as the temperature rises, the electrical resistance drops along a highly specific non-linear curve. At exactly 25°C (standard room temperature), a healthy thermistor will read approximately 100k ohms (100,000Ω). If you place your multimeter probes on the thermistor terminal pins while the machine is off and the room is 25°C, a reading of 0Ω indicates a dead short, while an infinite reading (OL) indicates a completely severed wire.
The heater cartridge operates under basic Ohm’s law parameters. To determine the exact resistance required for a functioning 24-volt, 40-watt cartridge, we utilize the power equation:

Plugging in the standard Ender 3 specifications:
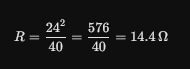
When testing the heater cartridge leads with your multimeter, a reading significantly lower than 14.4Ω indicates an internal short that will draw too much current and likely blow the motherboard fuse. A reading significantly higher indicates degraded internal resistance wires that can no longer generate adequate heat.
Step-by-Step Ender 3 E1 Thermal Runaway Error Fix Workflow
Executing a successful Ender 3 E1 thermal runaway error fix requires a systematic breakdown of the hotend ecosystem. Follow these precise mechanical procedures to isolate the exact point of failure.
Step 1: Motherboard and Terminal Inspection
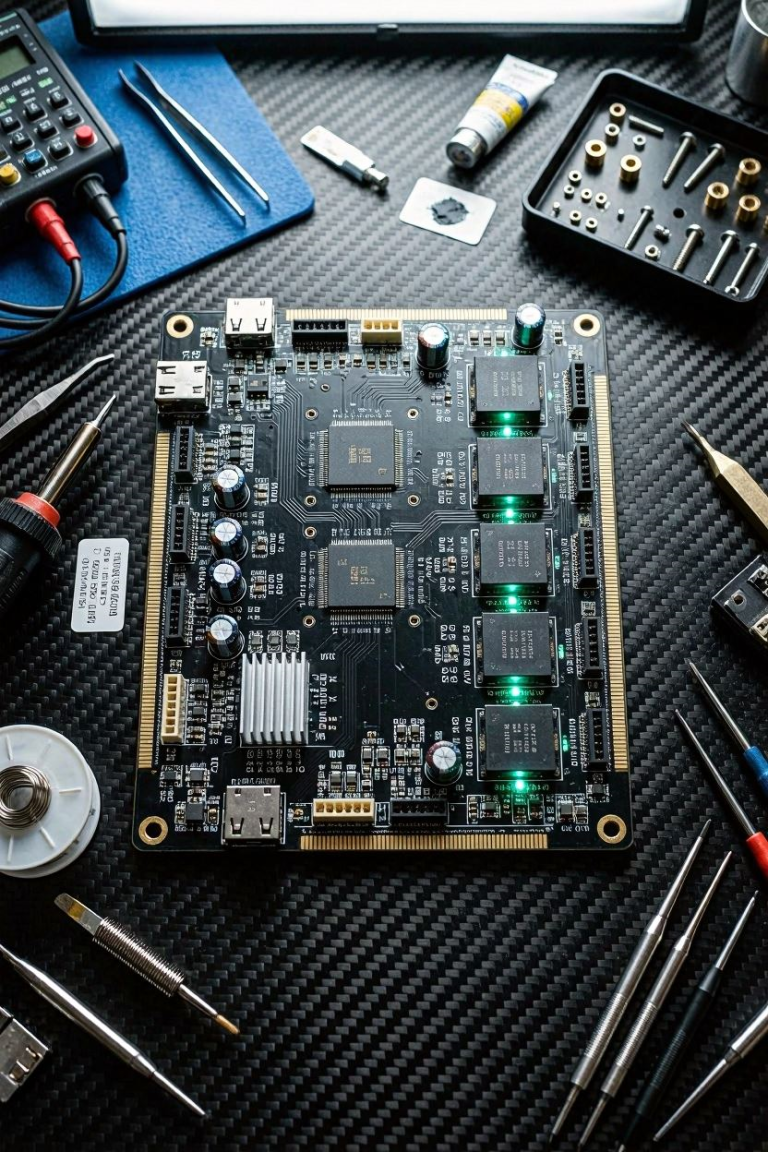
Before tearing apart the hotend carriage, you must eliminate the motherboard as the source of the problem. Disconnect the main power cable from the wall outlet. Using the appropriate Allen keys, remove the screws securing the metal shroud over the mainboard compartment.
Inspect the green terminal blocks where the heater cartridge wires connect to the board. One of the most dangerous and common failures is “terminal creep.” Because the stock wires are often tinned with solder rather than properly crimped with ferrules, the solder can slowly deform under the pressure of the screw terminal. This creates a loose connection that generates massive electrical resistance, causing the terminal block to literally melt or catch fire. If the plastic terminal block is brown, charred, or deformed, the entire motherboard requires replacement.
Step 2: Extracting and Testing the Thermistor
If the motherboard terminals are pristine, move to the hotend. Remove the two screws holding the black fan shroud and carefully set it aside. Ensure you do not aggressively yank the fan wires. Locate the small screw on the right side of the heater block holding the thermistor wires in place.
Carefully back this screw out and gently slide the glass bead out of the aluminum housing. Inspect the tiny glass bead under a bright light. If the glass is shattered, or if the white Teflon tubing has slid back to expose bare wire touching the block, the thermistor is destroyed. Unplug the thermistor from the motherboard and test the two pins with your multimeter set to the 200k Ohm range. If the reading does not stabilize around 100k Ohms at room temperature, throw the component away immediately.
Comprehensive Multimeter Diagnostic Guide for NTC Thermistors
Step 3: Verifying Heater Cartridge Output
If the thermistor passes the resistance test, the heater cartridge is the next target. Trace the thicker red cables from the hotend back to the motherboard and disconnect them. Set your multimeter to the lowest resistance setting (usually 200 Ohms) and probe the two wire ends.
As calculated earlier, you are looking for a reading of roughly 14.4Ω. If the reading fluctuates wildly or measures infinite resistance, the internal heating core has snapped. To remove the dead cartridge from the heat block, loosen the small grub screw located on the underside of the block. If the cartridge is seized inside the block due to thermal expansion or leaked plastic, you may need to apply a heat gun to expand the aluminum slightly before sliding it out.
Step 4: Executing a PID Autotune Sequence
If both hardware components pass multimeter testing and are seated perfectly within the heat block, the issue is entirely algorithmic. The firmware’s PID values control how aggressively the machine applies power to hit the target temperature without overshooting. When these values are incorrect, the temperature graph will look like a volatile rollercoaster, eventually dipping too low and triggering the E1 halt.
Tom’s Hardware
To fix this, you must run a PID Autotune. Connect your printer to a computer via USB and open a terminal interface like Pronterface or OctoPrint. Send the following G-code command to the machine: M303 E0 S200 C8
This command instructs the printer to run the autotune sequence on extruder zero (E0), targeting 200°C (S200), and running through eight complete heating and cooling cycles (C8). The machine will rapidly heat up and cool down, calculating the optimal Proportional, Integral, and Derivative variables.
Once the cycle is complete, the terminal will spit out three new values: Kp, Ki, and Kd. You must manually enter these new values into the firmware by typing: M301 P[Kp value] I[Ki value] D[Kd value] Hit enter, and then permanently save the new configuration to the EEPROM by typing: M500
Step 5: Power Supply Voltage Verification
If you have completed all previous steps and the E1 error still randomly occurs during heavy printing, the root cause may be inadequate power delivery from the Power Supply Unit (PSU). Locate the red voltage selector switch on the side of the silver PSU housing. Ensure it is correctly set to your local grid voltage (115V for North America, 230V for Europe). If it is set to 230V while plugged into a 115V outlet, the machine will power on, but the heater cartridge will only receive a fraction of the necessary wattage, completely crippling its heating capacity.
[IMAGE PLACEHOLDER: A bright red voltage selector switch on a silver 3D printer power supply unit being toggled with a flathead screwdriver + Alt Text: Verifying correct power supply voltage parameters to solve the Ender 3 E1 thermal runaway error fix.]
The Permanent Fix: Upgrading the Hotend Ecosystem
Continually replacing cheap, generic thermistors and low-quality heater cartridges is a massive waste of operational time. Stock components are manufactured with the lowest possible tolerances to keep initial retail costs down. If you want to permanently eliminate the Ender 3 E1 thermal runaway error fix from your daily workflow, you must transition to professional-grade hardware ecosystems.
Upgrading to Encapsulated Thermistors
The fatal flaw of the stock thermistor design is the fragile glass bead and the crushing pressure of the mounting screw. Upgrading to a brass-encapsulated thermistor completely solves this mechanical vulnerability. These premium thermistors feature the fragile NTC resistor sealed inside a threaded brass cylinder.
Instead of relying on a tiny set screw, the entire brass cylinder threads directly into the side of the heat block, providing vastly superior thermal conductivity and absolute protection against wire shorts. You can source high-quality M3-threaded thermistors directly through premium non-Amazon affiliate channels like MatterHackers or the official Creality ShareASale network storefronts. Replacing the stock wire with a threaded variant guarantees zero future grounding faults.
High-Performance Hotend Replacements
If your aluminum heat block is stripped, heavily oxidized, or coated in impenetrable layers of burnt PETG, trying to salvage it is a poor investment. Upgrading the entire hotend assembly to an all-metal, high-flow design is the ultimate permanent fix.
Premium solutions from brands like Micro Swiss or the official Creality Sprite Extruder Pro kit utilize vastly superior heating cores and precision-machined titanium heat breaks. These upgraded ecosystems are designed to effortlessly hold high temperatures (up to 300°C) without suffering from sudden thermal drops when the part cooling fan engages.
- MatterHackers Network Options: Sourcing an authentic Micro Swiss all-metal hotend guarantees perfect machining tolerances. The integrated heater blocks are specifically designed to accept encapsulated thermistors, making the entire assembly virtually bulletproof against E1 errors.
- Direct Manufacturer Upgrades: Utilizing the official Creality ecosystem ensures immediate compatibility with your existing mounting carriage, requiring zero custom 3D printed adapter plates.
Motherboard and MOSFET Enhancements
If your diagnostic tests revealed a blown MOSFET or melted terminal block, do not replace the board with another stock Creality 4.2.2 variant. Transitioning to a premium aftermarket board, such as the BigTreeTech SKR Mini E3, provides massive leaps in thermal safety.
These advanced motherboards feature dedicated thermistor short-circuit protection circuits. If a thermistor wire snaps or grounds out, the board physically isolates the circuit, protecting the primary CPU from catastrophic high-voltage damage. Furthermore, they utilize higher-rated MOSFETs and robust, screw-less terminal connectors that completely eliminate the risk of terminal creep and solder melting.
[INTERNAL LINK: The Complete Guide to Upgrading Your 3D Printer Motherboard for Silent Stepping]
Marlin Firmware Deep Dive: Modifying Thermal Runaway Logic
For operators running custom compiled Marlin firmware environments, the internal parameters governing the E1 error can be manually tuned. While this should never be used to bypass a physical hardware failure, adjusting the sensitivity is sometimes necessary when upgrading to massive, high-flow hotends that naturally take longer to heat up.
Open your Configuration_adv.h file within Visual Studio Code. You must locate the specific section governing thermal protection: #define THERMAL_PROTECTION_HOTENDS
Just below this activation line, you will find the critical operational variables. The THERMAL_PROTECTION_PERIOD defines exactly how many seconds the firmware will wait for a temperature recovery before throwing the E1 error. The default is typically set to 40 seconds. If you have installed a massive copper volcano block, it may legitimately take longer than 40 seconds to stabilize after the cooling fan turns on.
The THERMAL_PROTECTION_HYSTERESIS dictates the acceptable temperature drop range. If the default is set to 4 degrees, a drop from 200°C to 195°C will instantly start the protection timer. Carefully expanding the hysteresis to 6 degrees or extending the period to 60 seconds can prevent false-positive E1 errors on heavily modified machines. However, expanding these variables reduces the reaction speed of the safety net in the event of a genuine hardware failure.
Preventative Maintenance and Quick-Action Checklist
To ensure maximum operational uptime, integrate a strict preventative maintenance schedule into your weekly manufacturing routine.
- Execute a PID Autotune Every 30 Days: Thermal dynamics shift over time as nozzles wear down and cooling fans accumulate dust. A monthly baseline calibration ensures your heating algorithms remain perfectly synced with the physical hardware.
- Install Strain Relief: Use zip-ties or custom printed cable chains to securely anchor the thick wire loom leading to the hotend. Preventing the wires from flexing at the insertion point of the heat block will extend the lifespan of your thermistor indefinitely.
- Replace Silicone Socks Quarterly: Silicone degrades after hundreds of hours exposed to 200°C+ temperatures. Keep a bulk pack of replacement socks in your tool kit and swap them out the moment they begin to tear or sag.
- Check Terminal Blocks: Every 100 print hours, physically open the motherboard case and ensure the heater cartridge terminal screws remain completely tightened down.
By applying these rigid diagnostic workflows and understanding the exact mathematical constraints of the heating ecosystem, you will permanently conquer the Ender 3 E1 thermal runaway error fix and protect your vital equipment from disastrous meltdowns.