9 Advanced Snapmaker U1 Ironing Settings to Fix Inconsistent Top Layers (Stop Under-Extrusion!)
Achieving a flawless, glass-like top surface on your 3D prints is the holy grail of additive manufacturing. When you first dive into OrcaSlicer and enable the ironing feature, you expect injection-molded perfection. However, many users quickly discover that their default Snapmaker U1 ironing settings yield wildly inconsistent results.
Finding that your top right corner is supremely smooth while the lower left looks completely untouched is a highly frustrating mechanical paradox. If you are dealing with a top surface that degrades across the X/Y plane, or an ironing pass that suddenly fails the moment it crosses a raised geometric feature, you are not alone. These artifacts are rarely caused by a single software toggle.
Instead, they are the result of complex fluid dynamics colliding with microscopic bed leveling discrepancies. In this comprehensive, highly technical diagnostic manual, we will deconstruct the exact physics occurring at the tip of your nozzle. We will explore exactly 9 critical Snapmaker U1 ironing settings that you must adjust to defeat Auto Bed Leveling (ABL) fade and manage internal hotend pressure drops.
The “Quick Answer” / Key Takeaways Box
- The Default Flow Trap: The standard 15% ironing flow rate in OrcaSlicer is shockingly low for matte PLA. You must increase this to 25%–38% to properly fill the micro-valleys.
- The Raised Geometry Pressure Drop: If ironing fails immediately after the nozzle jumps over a raised part, your hotend is suffering from retraction pressure loss. You must inject extra prime on restart.
- Thermal Imbalance: Ironing at 20 mm/s while your nozzle is set to 220°C for high-speed printing causes the plastic to over-melt, leading to oozing and pitting.
- Monotonic Enforcement: You must force OrcaSlicer to use Monotonic line ordering to prevent light-reflecting scars where the toolhead changes directional paths.
- The Fading Artifact (Bed Tramming): If ironing is perfect on one side of the bed but absent on the other, your physical bed is out of tram, bypassing your Snapmaker U1 ironing settings.
The Thermodynamics of Snapmaker U1 Ironing Settings
Before adjusting any software sliders, you must fundamentally understand what ironing is physically doing to your polymer. Ironing is not simply printing another layer. It is a highly controlled, high-friction re-melting process.
When you trigger your Snapmaker U1 ironing settings, the machine lowers the nozzle so it sits barely a fraction of a millimeter above the completed top surface. The heated brass or steel tip physically contacts the cooled plastic lines. The toolhead then drags across this surface at a very slow speed, physically melting the high spots and smearing them into the low spots.
Simultaneously, the extruder motor pushes a microscopic trickle of new filament. This tiny volume of new plastic is designed to fill any remaining microscopic gaps between the extruded lines. If this delicate balance of heat, physical pressure, and micro-extrusion is disrupted by even a hundredth of a millimeter, the entire surface will fail.
The Problem with Matte PLA Fluid Dynamics
You noted that you are utilizing bluish-purple matte PLA. Matte filaments contain proprietary micro-additives, often chalk or elastomer particles, designed to diffuse light and hide layer lines.
These additives drastically alter the Melt Flow Index (MFI) of the plastic. Matte PLA is significantly more viscous than standard glossy PLA. When you attempt to push a microscopic 15% trickle of this highly viscous fluid through a nozzle traveling at 20 mm/s, the plastic resists shearing.
It clumps inside the nozzle rather than flowing out smoothly. To achieve successful Snapmaker U1 ironing settings with matte materials, you must completely override the default slicer profiles designed for standard, highly fluid PLA.
Setting 1: Calibrating the Base Ironing Flow Percentage
The most glaring vulnerability in default OrcaSlicer profiles is the baseline ironing flow rate. By default, the software often configures the ironing flow percentage to a shockingly low 10% or 15%.
When you observe an ironing pass that looks “untouched” or heavily pitted, you are witnessing severe under-extrusion. A 15% flow rate simply does not generate enough volumetric pressure to force the matte PLA out of the nozzle orifice consistently. The extruder gears are turning so slowly that the viscous plastic simply cooks inside the heater block, completely invalidating your Snapmaker U1 ironing settings.
To properly calibrate this, you must aggressively increase the flow limit. Navigate to the Quality tab in OrcaSlicer and scroll down to the Ironing configurations. Change your Ironing Flow from 15% to 25%.
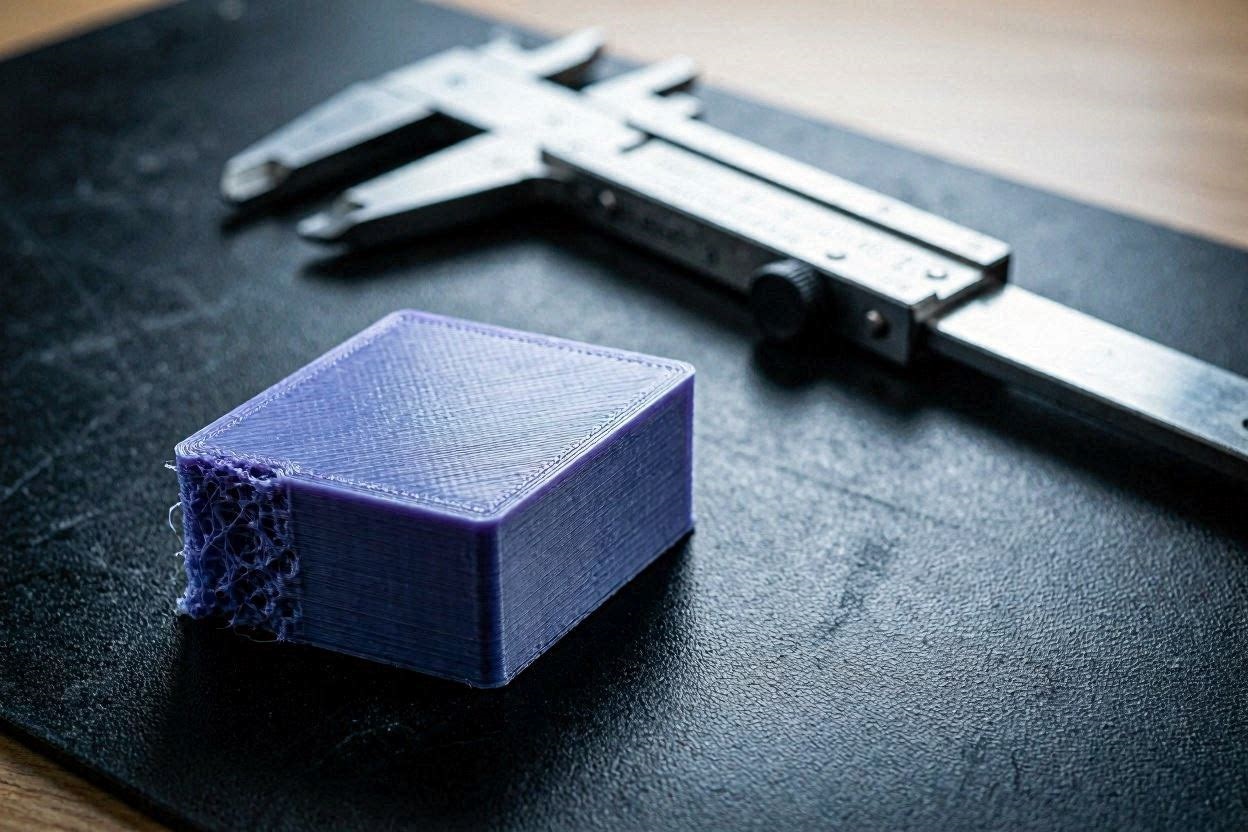
Print a small 20mm x 20mm flat test cube. If the surface still shows tiny gaps or pitted holes between the lines, increase the flow by 2% increments. Many expert technicians utilizing high-viscosity matte PLAs find that their optimal ironing flow sits between 32% and 38%. You will know you have gone too high if the nozzle begins plowing through excess plastic, leaving deep, rough ridges on the edges of the ironing paths.
Setting 2: Eliminating Auto Bed Leveling (ABL) Fade Height
If your ironing is “supreme” in the top right corner but degrades completely as it moves toward the lower left, you are suffering from a mechanical tramming failure. This specific issue overrides even the most perfect Snapmaker U1 ironing settings.
Many users assume that because they have an Auto Bed Leveling (ABL) mesh, their prints will be perfectly flat. This is a dangerous misconception. ABL software compensates for a warped bed by slightly moving the Z-axis up and down during the first few layers.
However, firmware algorithms utilize a feature called “Fade Height.” Fade Height gradually reduces the ABL compensation as the print gets taller, aiming to produce a geometrically square object rather than one that mirrors the warped bed. By the time your print reaches its top layer, the ABL compensation may be completely disabled.
If the physical build plate is lower on the left side than the right side, the top of your printed object will also be slightly lower on the left. Because ironing relies on a microscopic interference fit, even a 0.05mm drop in Z-height on the left side means the nozzle is suddenly floating in thin air. It is no longer touching the plastic, resulting in the “un-ironed” appearance. You must manually tram your bed with a dial indicator to fix this.
Setting 3: Extra Prime on Restart (Managing Pressure Loss)
You mentioned a highly specific, complex artifact: the ironing degrades immediately after the nozzle passes the threshold of a raised part, such as a 3D dog model protruding from the surface. This is a classic thermodynamic pressure failure affecting your Snapmaker U1 ironing settings.
When the toolhead is ironing a flat plane and suddenly encounters a raised geometric feature in its path, the slicer commands the toolhead to execute a travel move. The nozzle retracts the filament, flies over the raised part, and lands on the other side to resume ironing.
When the nozzle lands and executes an “un-retract” command, it is trying to repressurize the hotend. However, because your Snapmaker U1 ironing settings demand a microscopic flow rate (e.g., 25%), the extruder motor is barely moving. It takes several seconds for that slow-moving extruder gear to build enough internal pressure to push the thick matte PLA back out of the tip.
Consequently, the nozzle drags completely dry for several centimeters past the raised object. To permanently eradicate this dead zone, navigate to your Extruder Settings in OrcaSlicer. Locate the parameter titled Extra length on restart. Input a very small value, such as 0.05mm³ or 0.1mm³. This commands the extruder to aggressively push a tiny, instantaneous burst of plastic into the melt zone exactly as the nozzle touches down, instantly repressurizing the system.
Setting 4: Temperature Overrides for Ironing Speed
You are currently printing at high velocities (200-250 mm/s) utilizing a nozzle temperature of 220°C. This high temperature is absolutely necessary to melt plastic fast enough to sustain 250 mm/s. However, this creates a massive thermal imbalance within your Snapmaker U1 ironing settings.
You drop your toolhead velocity down to a crawling 20 mm/s for the ironing pass. When the filament slows down by a factor of 10x, it is subjected to 220°C heat for an exponentially longer duration. The matte PLA essentially boils inside the heater block.
It becomes water-thin and oozes out of the nozzle uncontrollably. This boiling plastic creates microscopic steam bubbles that pop on the surface of your print, creating the pitted, rough texture you are trying to avoid. You cannot successfully iron at 20 mm/s with a hotend sitting at 220°C.
To dial in your Snapmaker U1 ironing settings, you must lower the temperature of the melt zone specifically for the top layer. Right-click your model in OrcaSlicer and add a Modifier Box. Position the box so it only intersects the very top surface. Assign a custom temperature of 200°C or 205°C to this modifier. By cooling the hotend down during the slow ironing phase, the plastic regains its structural viscosity and smears beautifully.
Setting 5: Enforcing Monotonic Line Ordering
Even if your flow rate and bed tramming are perfect, your top layer can still look terrible if the toolhead pathing is inefficient. By default, some slicing algorithms attempt to save travel time by ironing in a rectilinear pattern.
The toolhead will iron a few lines on the left, travel to the right to iron a few lines, and then travel back to the middle to fill in the gap. When the hot nozzle meets a section of plastic that has already cooled, it creates a distinct, visible “scar” where the two paths overlap.
These scars reflect light differently, making the flat surface look like a patchwork quilt. To achieve a truly seamless finish with your Snapmaker U1 ironing settings, you must strictly enforce directional pathing.
Navigate to the Ironing settings in OrcaSlicer and ensure the Ironing Pattern is set to Monotonic. The Monotonic algorithm forces the toolhead to always lay down the ironing paths in one exact, continuous direction. The nozzle never travels back to intersect with a previously cooled section, perfectly aligning the polymer chains for a glass-like finish.
How to Calibrate OrcaSlicer Top Surface Patterns for Maximum Smoothness
Setting 6: Tightening the Ironing Line Spacing
The ultimate variable in determining the density of your top surface is the physical distance between each ironing pass. In OrcaSlicer, the Ironing Line Spacing dictates how far the nozzle shifts over before making its next stroke.
The default setting is typically 0.15mm. While this is sufficient for standard, glossy filaments, matte PLA does not flow as aggressively. A 0.15mm gap may be too wide for the viscous matte polymer to bridge, leaving microscopic valleys between the ironed strokes and degrading your Snapmaker U1 ironing settings.
To maximize the density of the melt, reduce your Ironing Line Spacing from 0.15mm to 0.10mm. This forces the nozzle to overlap its previous stroke by a much wider margin.
The physical brass tip will spend more time remelting the existing plastic, ensuring that absolutely zero microscopic gaps remain. Be aware that tightening this spacing will significantly increase the total time required to iron the part, but the resulting injection-molded finish is entirely worth the trade-off.
Setting 7: Z-Hop During Ironing Travels
When your nozzle needs to move from one side of the print to another without extruding, it executes a travel move. If the nozzle drags across the freshly ironed surface during this travel move, it will carve an ugly, melted scar right through the center of your flawless finish.
This entirely ruins the effort you put into optimizing your Snapmaker U1 ironing settings. To prevent this, you must configure Z-Hop (or Lift Z) specifically for top surfaces.
Navigate to the Extruder tab in OrcaSlicer and find the Z-Hop section. Ensure that Z-Hop Type is set to Normal or Spiral, and set the Z-hop height to at least 0.4mm. Crucially, ensure the setting “Only lift Z above” is not interfering with your top layers. By physically lifting the nozzle up and over the freshly ironed plastic, you eliminate any chance of accidental scarring.
Setting 8: Ironing Speed vs. Viscosity Matching
You noted your ironing speed is set to 20 mm/s. While this is a standard default, it may not be the optimal speed for your specific Elegoo Bluish Purple Matte PLA.
Ironing speed must perfectly match the viscosity of the polymer. If you are ironing too fast, the brass nozzle does not have enough time to transfer its thermal energy into the top layer. The high spots will not melt, and the micro-extrusion will sit on top of the print like a thin string.
If your Snapmaker U1 ironing settings are yielding rough results despite a high flow rate, try slowing the ironing speed down to 15 mm/s. Conversely, if you notice the plastic looks boiled or burnt, you may need to increase the speed to 25 mm/s to reduce the thermal dwell time. You must run a small test square at varying speeds to find the exact thermal matching point for your specific filament brand.
Setting 9: Extruder Gear Tension Optimization
The final setting is not in the software, but on the hardware itself. Ironing requires the extruder motor to push incredibly small, precise amounts of filament. If your extruder hardware is mechanically compromised, your Snapmaker U1 ironing settings will never be consistent.
Direct-drive extruders utilize a spring-loaded tension arm that presses the drive gears into the filament. If this tension is too loose, the gears will slip against the filament during the slow, 25% flow ironing phase. If the tension is too tight, the gears will crush the filament.
Crushing the filament turns it from a perfect 1.75mm circle into an oval. An oval filament drags against the internal walls of the PTFE tubing and the heat break, causing massive spikes and dips in extrusion pressure. You must manually adjust your extruder tension screw so the gears leave light, visible bite marks on the filament without physically deforming its overall circular shape.
[VIDEO PLACEHOLDER: A technical demonstration of adjusting direct-drive extruder tension to prevent filament deformation during micro-extrusion.]
The Permanent Fix: Hardware Upgrades for Snapmaker U1 Ironing Settings
While advanced slicer tuning will mitigate the vast majority of surface scarring, pushing thick, viscous matte polymers at slow speeds exposes the thermodynamic limitations of stock hardware. Software algorithms cannot permanently fix cheap thermal engineering or warped aluminum beds.
To achieve absolute, glass-like surface perfection without spending hours tweaking Snapmaker U1 ironing settings for every new spool, you must upgrade your extrusion and build-plate ecosystem. Professional print farms do not battle flow rate inconsistencies; they eliminate them with industrial-grade components.
Upgrade to a High-Flow CHT Nozzle
Standard brass nozzles feature a single, smooth internal bore. When attempting to iron viscous matte PLA, the thermal transfer from the outer brass to the core of the plastic is highly inconsistent. This leads to the exact pressure drop-offs and un-ironed patches you experienced near the raised geometry.
You must upgrade to a premium CHT (Core Heating Technology) nozzle. These advanced components feature internal copper splitters that divide the filament into three separate pathways inside the melt zone. This exponentially increases the heated surface area, ensuring the plastic melts homogenously.
By installing a premium CHT or an ultra-hard, thermally superior Diamondback nozzle (available through industrial suppliers via the ShareASale or MatterHackers affiliate networks), you eliminate back-pressure completely. Your Snapmaker U1 will lay down ironing passes with absolute, liquid precision, responding instantly to un-retract commands without any dry dragging.
Install a G10 / FR4 Garolite Build Plate
We established that the “fading” ironing effect is caused by a physically warped aluminum bed that Auto Bed Leveling cannot perfectly compensate for. Flexible magnetic spring-steel PEI sheets simply conform to whatever warps exist in the aluminum plate beneath them.
To achieve a mathematically flat top surface, your foundation must be mathematically flat. Upgrading to a rigid, 3mm thick G10 (FR4 Garolite) build plate completely bypasses the minor warps in your factory aluminum bed. Garolite is an industrial composite that maintains absolute structural flatness under extreme thermal cycling. By sourcing a custom-cut G10 plate through specialist vendors on PartnerStack, you guarantee that your microscopic ironing tolerances remain perfectly constant from the top right corner to the lower left.
Implement Active Filament Desiccation
Matte PLA is highly hygroscopic. When it absorbs atmospheric moisture, that trapped water boils inside the 220°C hotend. During a slow ironing pass, these microscopic steam explosions violently disrupt the surface tension of the plastic, creating permanent pits and scars.
You must stop storing your filament in plastic tubs. Invest in an active, heated filament dryer like the Sunlu S4. This allows you to bake your spools at 50°C, feeding bone-dry filament directly into your extruder. Dry filament flows with absolute predictability, locking in your highly sensitive Snapmaker U1 ironing settings permanently. Premium active dryers can be sourced directly through manufacturer programs on the Impact affiliate network.
Official Klipper Documentation on Advanced Extruder Kinematics and Pressure Advance]
Quick-Action Preventative Maintenance Checklist
To maintain your flawlessly smooth, ironed top surfaces and protect your hardware investments, implement this strict preventative maintenance protocol before your next major production run:
- Audit Your Filament Diameter: Never trust the factory label. Use digital calipers to measure your new spool of filament in five different spots. Average the number and input that exact diameter into your OrcaSlicer filament profile. Viscous matte filaments that fluctuate in diameter will instantly ruin your ironing flow calibrations.
- Clean the Nozzle Exterior: Matte PLA is inherently sticky. During a 10-hour print, microscopic amounts of plastic will cling to the outside of the hot nozzle and carbonize. When the toolhead lowers to execute the ironing pass, these burnt black chunks will drag through your pristine top layer. Scrub the nozzle tip completely clean with a brass wire brush while heated before every print.
- Verify Z-Axis Lubrication: Ironing requires the Z-axis stepper motors to hold the gantry at an exact, micro-stepped height. If your Z-axis lead screws are dry or binding with dust, the gantry will sag by fractions of a millimeter, completely destroying the ironing interference fit. Wipe down the lead screws and apply a fresh coat of PTFE synthetic grease every 150 print hours.
- Perform a Nylon Cold Pull: Viscous materials leave residue inside the heat break. A partial clog alters nozzle pressure, ruining the micro-extrusion required for ironing. Run a cold pull weekly to extract carbonized debris.
By treating your 3D printer as a high-precision fluid dynamics system and implementing these rigorous slicer and hardware calibrations, you will completely eliminate frustrating surface scarring. Master your Snapmaker U1 ironing settings, stop accepting inconsistent top layers, and start manufacturing with elite, industrial-grade perfection.