7 Proven Steps for the Bambu A1 Mini Stringing Fix (Permanent Solution!)
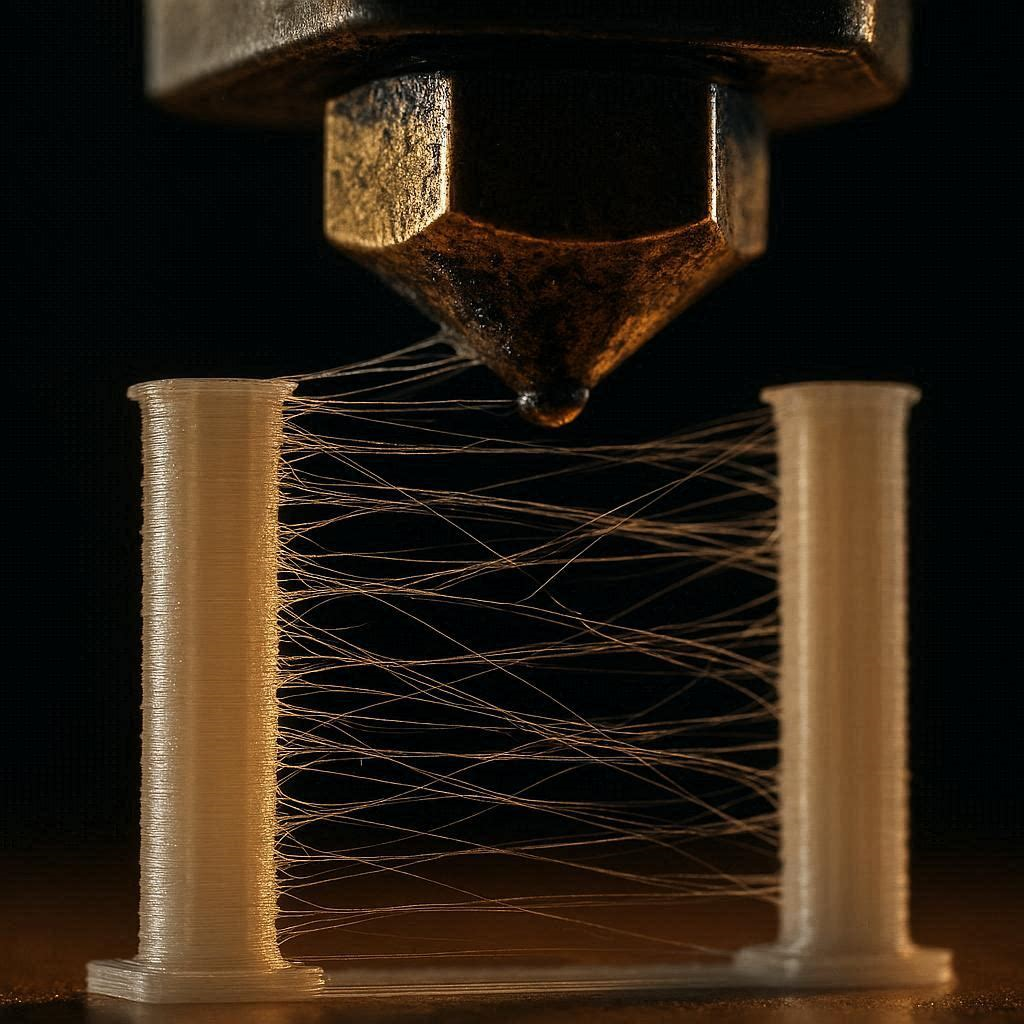
Experiencing severe oozing that ruins your prints is incredibly frustrating, especially when you are looking for a reliable Bambu A1 Mini stringing fix. You have a brand new roll of PLA, your bed adhesion is flawless, and your first layers are pristine. Yet, the moment the printhead travels across an open gap, it leaves behind a disastrous web of fine plastic threads.
The most confusing part is that your retraction calibration towers look completely perfect. You have tested every temperature variable from 190°C to 220°C in OrcaSlicer, but nothing seems to stop the oozing on your actual models. This specific anomaly—where test prints succeed but real prints fail—requires a deep dive into the thermodynamics of your specific hardware configuration.
In this comprehensive guide, we will break down exactly why your 0.4mm hardened steel nozzle and OrcaSlicer profile are causing this behavior. We will explore the hidden variables behind thermoplastic flow, nozzle pressure, and travel vectors. By the end of this technical manual, you will have the exact, step-by-step Bambu A1 Mini stringing fix to restore your print quality to factory perfection.
The “Quick Answer” / Key Takeaways Box
- Dry Your Filament: Even vacuum-sealed, brand-new PLA contains manufacturing moisture that boils in the hotend, causing pressure-based stringing.
- Increase Temperature: Hardened steel nozzles have poor thermal conductivity. Printing PLA at 190°C makes the plastic too viscous to retract cleanly. Bump it to 210°C.
- Disable Normal Z-Hop: A vertical lift pulls molten plastic straight up like hot cheese. Use “Spiral” Z-hop or disable it entirely in OrcaSlicer.
- Increase Travel Speed: Set your non-print travel speeds to at least 300 mm/s to minimize the time gravity has to pull plastic from the nozzle.
- Optimize Wipe Settings: Ensure “Wipe while retracting” is active with a 15% to 20% retract amount before the wipe initiates.
Diagnosing the Retraction Tower Anomaly
Before tweaking any software sliders, we must understand why your retraction tower tests are lying to you. Many users seeking a Bambu A1 Mini stringing fix start with standard calibration towers. These towers consist of two small pillars placed very close together.
Because the pillars are only a few millimeters apart, the printhead’s travel time between them takes mere fractions of a second. The molten plastic inside the hotend simply does not have enough time to ooze out before the nozzle begins printing the next layer. The fast, short movements mask the underlying nozzle pressure issues.
However, when you slice a real model in OrcaSlicer, the travel paths are significantly longer and more complex. As the toolhead moves across a 50mm or 100mm gap, gravity and internal hydraulic pressure force the molten PLA out of the nozzle tip. This is why your stringing is persistent on every print, regardless of the temperature tower results. To achieve a true Bambu A1 Mini stringing fix, we have to look past the calibration towers.
The Hardened Steel Temperature Trap
One of the most critical factors in this specific Bambu A1 Mini stringing fix revolves around your hardware choice. You are utilizing a 0.4mm hardened steel nozzle instead of the standard stainless steel or brass variants. Hardened steel is phenomenal for abrasive materials like carbon fiber or glow-in-the-dark filaments, but it has a massive drawback: thermal conductivity.
Brass has a thermal conductivity rating of around 110 W/m·K, allowing heat from the heater block to rapidly penetrate the core of the filament. Hardened steel sits much lower, around 45 W/m·K. When you set your OrcaSlicer profile to print PLA at 190°C, the thermistor reads 190°C at the heater block, but the actual core temperature of the plastic inside the steel nozzle might only be 175°C to 180°C.
At this lowered temperature, the PLA is melted enough to extrude, but it remains highly viscous and gummy. When the extruder gears pull the filament back during a retraction, this gummy plastic stretches instead of snapping cleanly. It drags behind the nozzle, creating thick strings.
[IMAGE PLACEHOLDER: A technical diagram comparing the thermal conductivity of a brass nozzle versus a hardened steel nozzle + Alt Text: Diagram showing heat transfer rates relevant to the Bambu A1 Mini stringing fix.]
To implement this phase of the Bambu A1 Mini stringing fix, you must counterintuitively raise your printing temperature. Try bumping your nozzle temperature to 205°C or even 215°C. Heating the PLA further makes it less viscous and more fluid. When the direct-drive extruder snaps the filament back, the highly fluid plastic breaks off cleanly inside the melt zone, completely eliminating the string.
The Invisible Culprit: Hygroscopic Moisture
A common misconception in the 3D printing community is that brand-new, vacuum-sealed filament is completely dry. This is mathematically and practically false. During the extrusion process at the filament manufacturing plant, the hot plastic strands are pulled through long water baths to cool them rapidly and maintain dimensional accuracy.
If the filament is spooled and sealed before the ambient moisture evaporates, the spool arrives at your door saturated with water. PLA is hygroscopic, meaning it acts like a sponge for environmental humidity. When water-logged filament enters a 200°C hotend, the moisture instantly flashes into steam.
This steam expansion creates miniature explosions inside the melt zone. The rapidly expanding gas drastically increases the internal nozzle pressure. When your printer executes a retraction command, the extruder gears pull the solid filament back, but the expanding steam continues to push molten plastic out of the tip. No amount of software tuning will override the laws of thermodynamics.
The most vital step in any Bambu A1 Mini stringing fix is thorough desiccation. You must place your “new” PLA into a dedicated filament dryer at 45°C to 50°C for a minimum of 6 to 8 hours. Once the moisture is evacuated, the internal nozzle pressure stabilizes, and your retraction settings will finally behave as expected.
[INTERNAL LINK: Placeholder for “How to Calibrate Pressure Advance in OrcaSlicer for Perfect Corners”] (Prompt for internal link article at the bottom of this document)
Deep Dive into OrcaSlicer Retraction Mechanics
Once the physical hardware and environmental factors are neutralized, we must optimize the software. OrcaSlicer offers incredibly granular control over the toolhead’s behavior. For the Bambu A1 Mini stringing fix, we must look at the direct-drive extruder’s specific limitations.
The A1 Mini features a highly responsive direct-drive toolhead. Because the extruder gears are located mere millimeters above the melt zone, you do not need the massive 5mm to 7mm retraction lengths common on Bowden setups. In fact, pulling the filament too far back in a direct-drive system will cause molten plastic to be dragged into the cold zone, leading to immediate heat creep and fatal clogs.
Start by setting your retraction length to 0.8mm. If stringing persists, increase it in 0.2mm increments, but absolutely never exceed 1.5mm on the A1 Mini. Next, adjust your retraction speed. A speed of 35 mm/s is the standard baseline, but some viscous PLAs respond better to a faster snap. Try increasing the retraction speed to 45 mm/s to aggressively sever the molten plastic strand.
Mastering Z-Hop and Wipe Settings
Z-Hop is a feature designed to prevent the nozzle from colliding with printed parts during travel moves. When a retraction is triggered, the Z-axis lowers the build plate (or raises the toolhead) by a fraction of a millimeter. While this prevents collisions, a “Normal” vertical Z-Hop is detrimental to the Bambu A1 Mini stringing fix.
When the nozzle lifts perfectly straight up, it acts exactly like pulling a slice of hot pizza away from the pie; it stretches the melted plastic into a long, vertical string that then gets dragged across the build plate.
[IMAGE PLACEHOLDER: A screenshot of the OrcaSlicer Extruder settings tab highlighting the Z-hop and Wipe configurations + Alt Text: OrcaSlicer interface showing the best settings for the Bambu A1 Mini stringing fix.]
In OrcaSlicer, navigate to your extruder overrides or filament settings and change the Z-Hop type to “Spiral” or “Slope”. This forces the toolhead to lift away at an angle. This angled movement utilizes the edge of the printed perimeter to physically pinch and break the filament string before the travel move begins. Alternatively, if your model does not have complex, curling overhangs, simply disable Z-Hop entirely. Keeping the nozzle flush with the printed surface traps the ooze inside the part.
Additionally, you must activate “Wipe while retracting”. Wiping instructs the toolhead to move slightly inward over the already-printed infill while the extruder is pulling the filament back. This essentially wipes the excess nozzle pressure onto the inside of the model where it cannot be seen. Set your wipe distance to 2mm, and ensure the “Retract amount before wipe” is set to 15%. This guarantees the pressure is actively dropping as the wiping motion occurs.
[EXTERNAL LINK: Bambu Lab Official Wiki on Extruder Maintenance and Clog Prevention]
Optimizing Non-Print Travel Speeds
Time is the ultimate enemy of the Bambu A1 Mini stringing fix. The longer the nozzle spends traversing open air, the more time gravity and residual pressure have to force plastic out of the 0.4mm orifice. Your goal is to move the toolhead from Point A to Point B faster than the plastic can physically leak.
The Bambu A1 Mini is a lightweight, high-speed bed slinger capable of incredible accelerations. In OrcaSlicer, navigate to the Speed tab. Locate the “Travel” speed parameter. If this is set below 200 mm/s, it is far too slow for modern high-speed printing profiles.
Increase your Travel speed to 300 mm/s or even 400 mm/s. Furthermore, ensure your travel acceleration is appropriately high (typically around 3000 to 5000 mm/s² on the A1 Mini). By minimizing the travel duration, the nozzle simply reaches its destination before a string has the opportunity to form.
The Permanent Fix: High-Ticket Upgrades
While slicer tuning is essential, relying on stock parts will eventually limit your capability. For a definitive, zero-maintenance Bambu A1 Mini stringing fix, you must invest in the hardware ecosystem that professional makers use to guarantee flawless output. By upgrading your thermal management and raw materials, you bypass the engineering bottlenecks of entry-level components.
1. Active Active Filament Dehydration Systems You cannot fix wet filament with software. Investing in a premium filament dryer is mandatory for consistent extrusion. High-end units like the Sunlu S4 or the Eibos Cyclopes allow you to actively heat and circulate air around multiple spools simultaneously. Drying your PLA at 50°C while printing completely eliminates steam-based pressure surges, ensuring crisp retractions every single time.
2. Premium CHT (Core Heating Technology) Nozzles If you want to maintain the abrasion resistance of hardened steel without suffering from its terrible thermal conductivity, you must upgrade your hotend architecture. Aftermarket CHT-style nozzles split the filament into three separate flow paths inside the melt zone. This exponentially increases the surface area contact between the heating element and the plastic. You get the incredible flow rates and precise melting of brass, combined with the indestructible nature of hardened steel.
3. Engineering-Grade PLA Not all plastics are polymerized equally. Budget Amazon filaments use cheap binders and low-quality resins that have inconsistent diameter tolerances. If the filament is thicker in some spots, it causes over-extrusion and stringing. Switching to premium, dimensionally stable brands like Polymaker PolyTerra or Prusament guarantees a strict ±0.02mm tolerance. Better raw chemistry equates to a perfect Bambu A1 Mini stringing fix without hours of software debugging.
Quick-Action Preventative Maintenance Checklist
To maintain your flawless print quality and ensure your Bambu A1 Mini stringing fix lasts for the lifespan of the machine, follow this routine maintenance protocol. Implement these checks every 100 hours of printing.
- Scrub the Extruder Gears: Remove the toolhead cover and use a stiff nylon brush to clean the hardened steel extruder gears. Built-up PLA dust causes the gears to slip during retractions, ruining your stringing calibration.
- Check the PTFE Bowden Tube: Even on a direct-drive setup, the reverse-Bowden tube guiding filament from the spool to the head can wear out. If the tube is heavily scored, the friction will delay the retraction pulling force. Replace it with high-tolerance Capricorn PTFE tubing.
- Perform a Cold Pull: Over time, carbonized plastic builds up inside the nozzle walls, restricting flow and altering nozzle pressure. Perform a nylon cold-pull to extract debris and restore the smooth internal geometry of your 0.4mm nozzle.
- Recalibrate Flow Dynamics: Whenever you switch to a new brand of PLA, run the automated Flow Dynamics (Pressure Advance) calibration sequence on the A1 Mini screen to ensure the linear advance K-values perfectly match the specific viscosity of your current spool.