7 Brilliant Ways to Fix 3D Print Ironing Pores (Stop Matte PLA Gaps!)
You have spent hours dialing in your Bambu P2S. Your walls are flawless, your dimensional accuracy is locked in, and you decide to enable the ironing feature in Bambu Studio to achieve that coveted, injection-molded top surface. When the print finishes, you are met with a baffling mechanical paradox.
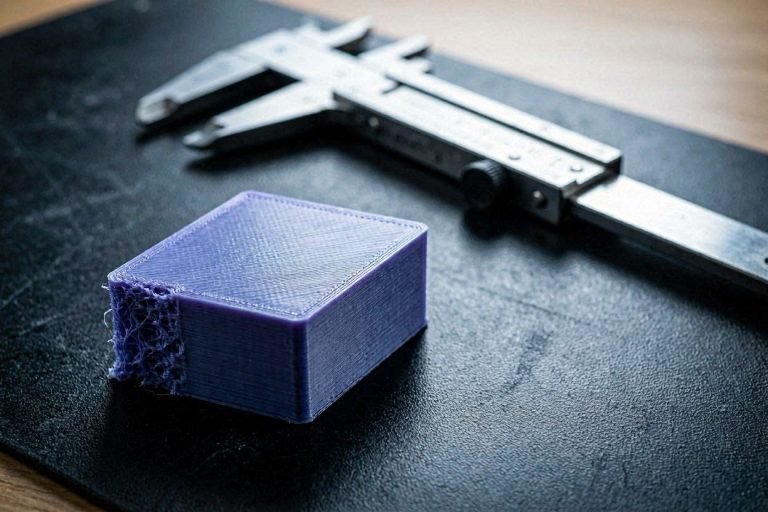
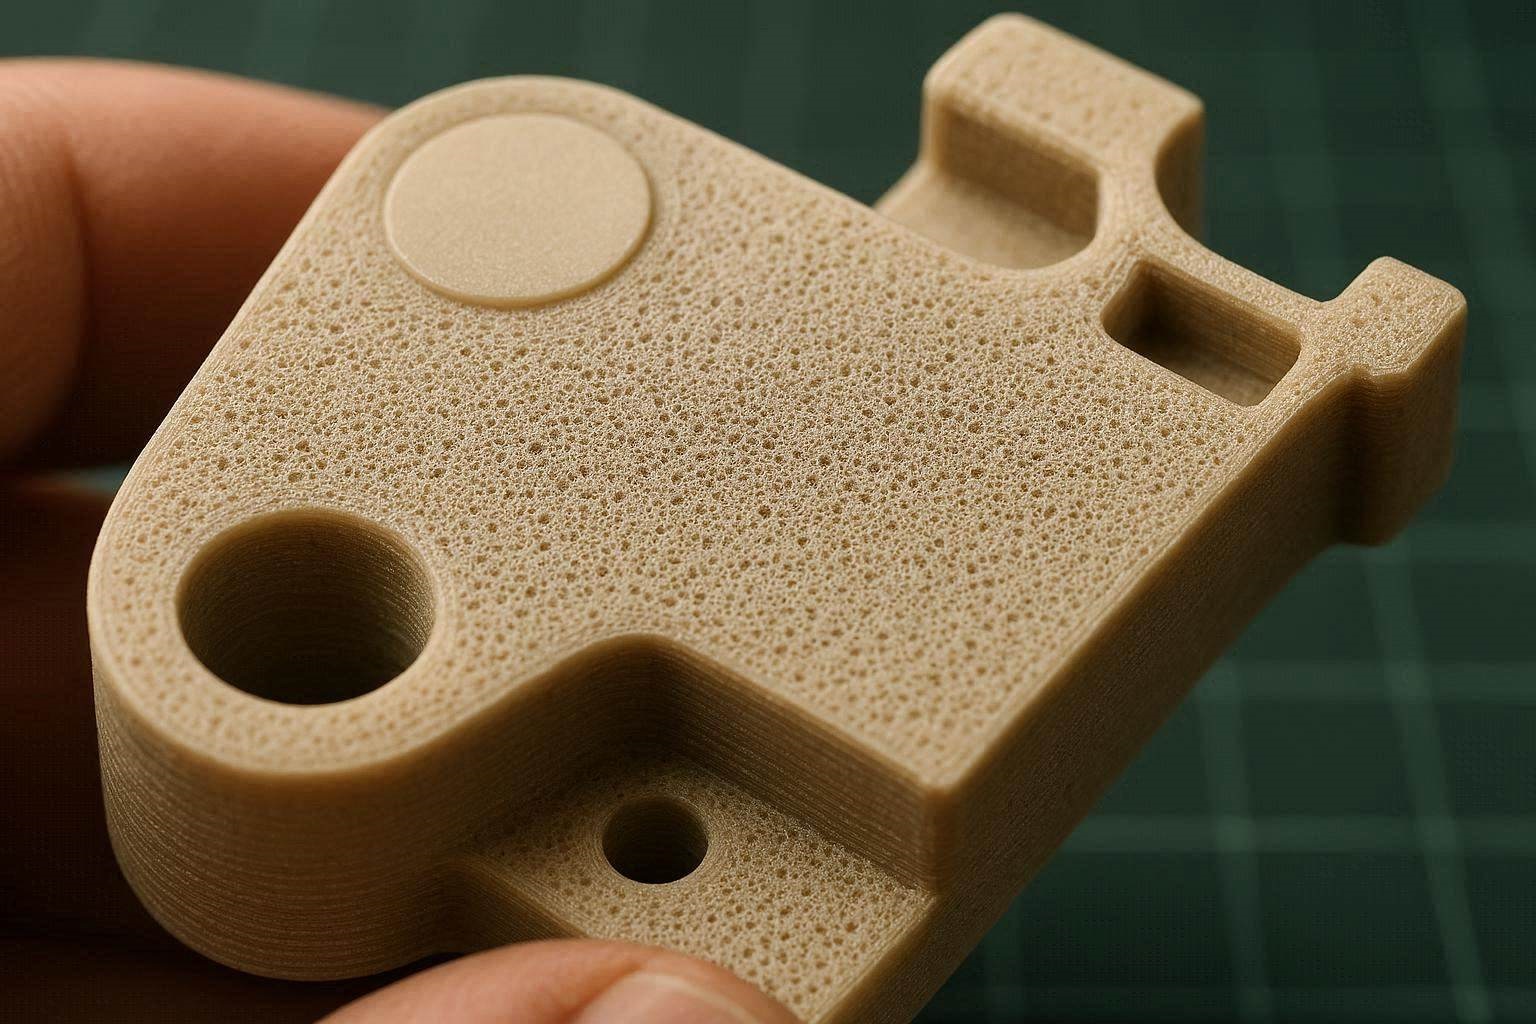
The small circular details on your top layer look like perfectly smooth glass. However, the vast, sweeping flat areas surrounding those circles look like a kitchen sponge. The surface is heavily degraded, covered in microscopic gaps, rough patches, and severe under-extrusion. If you are desperately tweaking your flow rates to fix 3D print ironing pores, you have likely discovered that generic calibration towers do not solve this specific artifact.
This geometric failure is not a random glitch; it is a highly specific manifestation of fluid dynamic depletion occurring inside your hotend. In this exhaustive, deeply technical diagnostic manual, we will deconstruct the exact physics of the ironing pass. We will explore why molten polymer behaves differently on large travel vectors, why Matte PLA exacerbates the issue, and provide the exact mathematical slicer configurations required to definitively fix 3D print ironing pores across your entire build plate.
The “Quick Answer” / Key Takeaways Box
- The Nozzle Depletion Paradox: Pores appear on large surfaces because the molten filament oozes out of the nozzle faster than the ultra-slow ironing extrusion rate can replace it. The nozzle literally runs dry halfway across the part.
- Volumetric Flow Overhaul: To counter depletion on large surfaces, you must drastically increase your overall volumetric output. A proven metric is widening the line spacing to 0.15mm, bumping flow to 22%, and increasing speed to 40 mm/s.
- Tightening Geometric Scaling: If your flow is adequate but gaps remain, you must decrease your Ironing Line Spacing from the default 0.1mm down to 0.08mm to physically force the extrusion paths to overlap.
- The 1-Degree Angle Hack: Changing your ironing pattern angle to 1° forces the nozzle to cross over the underlying top-shell lines diagonally, effectively filling the microscopic valleys between the extrusions.
- The Matte PLA Variable: Matte filaments contain particulate additives that increase viscosity and thermal retention. They boil and ooze far more aggressively than standard glossy PLA at 220°C.
The Physics of Ooze Depletion
To successfully fix 3D print ironing pores, you must first abandon the assumption that your extruder is operating at a constant pressure. During a standard printing phase, the extruder motor is pushing filament rapidly, maintaining a high, stabilized pressure inside the melt zone.
When Bambu Studio initiates an ironing pass, the kinematic rules change entirely. The printer drops its speed to a crawl (e.g., 30 mm/s to 50 mm/s). The extruder motor nearly stops, dropping its volumetric flow rate to a mere 10% or 15% of standard output. The goal is to use the flat heated shoulder of the brass nozzle to physically smear the existing plastic, while depositing a microscopic trickle of new plastic to fill any remaining valleys.
Why Small Shapes Succeed and Large Shapes Fail
When the nozzle irons a small circle, the travel distance is incredibly short. The internal pressure of the hotend remains relatively stable for the few seconds it takes to complete the shape. The trickle of plastic is sufficient, and the surface looks like glass.
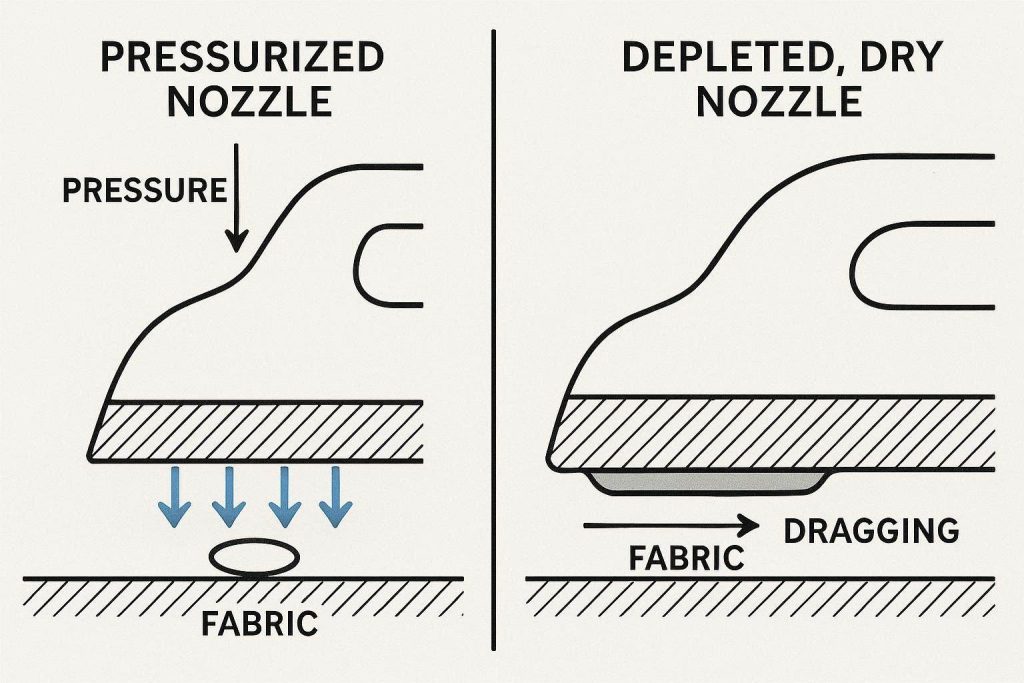
When the nozzle moves to a massive, sweeping flat surface, a thermodynamic failure occurs. Because the hotend is sitting at 220°C, the highly fluid molten plastic naturally wants to ooze out of the 0.4mm orifice due to gravity. On a long, slow travel path, this natural oozing outpaces the microscopic 15% flow rate commanded by the slicer.
Within a few centimeters of travel, the melt zone physically empties itself. The nozzle runs completely dry. The brass tip continues to drag across the plastic, but there is no new material to fill the gaps. The nozzle tears the semi-molten surface, creating the sponge-like, pitted texture. To effectively fix 3D print ironing pores, we must mathematically restructure the extrusion rate to outpace this natural oozing.
Step 1: Modulating the Volumetric Ironing Ratio
If your nozzle is running dry on long passes, your current settings (e.g., 35% flow at 50 mm/s) are fundamentally imbalanced. A 35% flow rate at 50 mm/s is pushing the plastic too fast across the surface, causing the extruder to stretch the thin filament strand until it snaps, creating pores.
To counteract the ooze depletion effect on massive flat surfaces, you must force the extruder to process a higher volume of plastic over a slightly wider physical area.
The 6x Extrusion Multiplier Technique
Advanced operators resolve this specific depletion artifact by dramatically altering the three core ironing parameters in tandem. Navigate to the Quality tab in Bambu Studio and locate the Ironing section.
- Change your Ironing Line Spacing (Line Width) from the default 0.1mm to 0.15mm.
- Change your Ironing Flow Rate from 10% to 22%.
- Change your Ironing Speed to 40 mm/s.
This specific mathematical combination achieves a critical objective. It increases the overall extrusion rate while simultaneously giving the flat shoulder of the nozzle a wider physical lane to smear the plastic. The hotend never runs dry, because the 22% flow at 40 mm/s consistently feeds exactly as much plastic as the nozzle is naturally losing to gravity. The continuous pressure completely eradicates the pitted pores.
Step 2: Tightening the Ironing Line Spacing
If you have adjusted your flow rates but still observe a distinct, woven, or porous texture across your matte prints, you are suffering from a geometric scaling failure.
In Bambu Studio, the Ironing Line Spacing dictates how far the X/Y gantry shifts the toolhead over before initiating the next parallel ironing stroke. The default setting is 0.1mm. For highly fluid, standard glossy PLA, this 0.1mm gap allows the thin plastic to bleed together and fuse into a single sheet.
Compensating for Viscous Polymers
Matte PLA behaves differently. It is highly viscous and resists natural flowing. When you leave a 0.1mm gap between strokes, the thick matte polymer refuses to bridge the gap. The result is a series of microscopic valleys between your ironing strokes, which visually register as deep pores or pitting.
To definitively fix 3D print ironing pores using mechanical overlap, you must force the nozzle to cover more ground.
- Navigate to your Ironing settings.
- Decrease the Ironing Line Spacing from 0.1mm down to 0.08mm or even 0.07mm.
By tightening this spacing, you force the nozzle to physically overlap its previous stroke by a massive margin. The brass tip will spend significantly more time remelting the existing plastic, physically forcing the dense matte polymer into the microscopic valleys and sealing the surface completely.
Step 3: Executing the 1-Degree Angle Hack
Even with perfect flow and perfect spacing, the physical pattern the slicer chooses can instigate surface pitting. By default, Bambu Studio often sets the top surface pattern and the ironing pattern to the same alignment.
If your underlying top solid infill was printed perfectly horizontally (0 degrees), and your ironing pass is also printed perfectly horizontally (0 degrees), the ironing nozzle is simply driving inside the tiny grooves left by the layer below it. It is not filling the gaps; it is just following the train tracks.
The Diagonal Shear Strategy
To obliterate these grooves and successfully fix 3D print ironing pores, you must force the nozzle to travel across the underlying lines.
- Open your slicer and navigate to the Strength tab (or the Ironing specific modifiers).
- Locate the Ironing Angle or Ironing Direction parameter.
- Change the angle to exactly 1° (or alternatively, 45°).
By shifting the angle just one single degree off the horizontal axis, the nozzle slowly shears across the underlying extrusion lines. Instead of riding inside the valleys, it uses its flat heated shoulder to physically bulldoze the high ridges of the plastic directly into the low valleys. This shear force acts like a microscopic trowel, resulting in a dead-flat, pore-free surface.
How to Optimize Top Surface Infill Patterns for Injection-Molded Finishes
Step 4: The Chemical Reality of Matte PLA
You noted in your diagnostic criteria that you are printing with Bambu PLA Matte. It is imperative to understand that matte filaments are chemically distinct from standard PLA, and these chemical differences directly cause severe ironing failures.
To achieve that beautiful, non-reflective finish, manufacturers blend microscopic particulates—such as chalk, elastomers, or specific resins—into the polymer base. These particulates are designed to scatter light, but they fundamentally alter the Melt Flow Index (MFI) of the plastic.
Thermal Retention and Micro-Boiling
Matte PLA retains heat longer and boils faster than standard PLA. When you drop your toolhead speed to 40 mm/s for an ironing pass, the filament remains inside the 220°C melt zone for an exponentially longer duration than it does during normal 200 mm/s wall printing.
At 220°C, the slow-moving matte polymer literally begins to boil inside the nozzle. The particulate additives create microscopic steam pockets and gas bubbles. As the nozzle drags across your large flat surface, these bubbles pop, leaving behind the exact sponge-like, pitted pores you are trying to eliminate.
Step 5: Lowering Ironing Temperature via Modifiers
You cannot successfully iron Matte PLA at 220°C using ultra-slow kinematics. The thermal imbalance guarantees boiling and pitting. To fix 3D print ironing pores, you must drop the hotend temperature specifically and exclusively for the top layer.
Bambu Studio does not currently have a native, single-click “Ironing Temperature” offset. However, you can achieve this using the advanced Modifier geometry tools.
- Right-click your model on the virtual build plate.
- Select Add Modifier > Box.
- Resize and position the translucent modifier box so it only intersects the top 1.0mm of your model’s flat surface.
- With the modifier box selected, navigate to the Process panel and click the Objects tab.
- Override the Nozzle Temperature for that specific modifier box, lowering it from 220°C down to 205°C or 200°C.
By running the hotend cooler during the top layers and the subsequent ironing pass, the Matte PLA regains its structural viscosity. It stops boiling, stops creating gas bubbles, and smears with heavy, predictable consistency, permanently eradicating the sponge texture.
[VIDEO PLACEHOLDER: A screen-recording tutorial demonstrating how to apply a temperature modifier box specifically to the top layers in Bambu Studio.]
Step 6: Ensuring Base Top Layer Solidity
Ironing is not a magic eraser; it cannot conjure plastic out of thin air. The ironing process relies entirely on melting the very top 0.1mm of the underlying plastic shell.
If the solid top shell beneath the ironing pass is under-extruded, porous, or sagging into the sparse infill (a defect known as pillowing), the ironing pass will fail catastrophically. The tiny 20% trickle of plastic will simply fall into the deep voids of the underlying layer, leaving massive, unfixable pores on the surface.
Fortifying the Foundation
Before you attempt to fix 3D print ironing pores, you must guarantee that your un-ironed top surface is already mathematically solid.
- Navigate to the Strength tab in Bambu Studio.
- Locate the Top Shell Layers parameter.
- Increase this value to ensure your top shell is at least 1.0mm to 1.2mm thick (e.g., 5 or 6 top layers at a 0.2mm layer height).
- Ensure your Top Surface Pattern is set to Monotonic Line. Monotonic pathing forces the toolhead to print all lines in a single, continuous direction, preventing the overlap scars that typically ruin ironing passes.
By providing a thick, dense, unyielding foundation, the ironing nozzle has a solid canvas of plastic to remelt, ensuring the molten polymer stays on the surface rather than draining into the infill.
The Permanent Fix: High-Ticket Thermal Upgrades (Monetization Section)
While executing complex slicer modifier boxes and altering line spacing will resolve the vast majority of surface pitting, printing highly viscous matte polymers at slow speeds exposes the absolute thermal limitations of stock hardware. Software algorithms cannot permanently fix cheap thermal engineering or generic nozzle geometry.
To achieve industrial-grade, injection-molded surface perfection without spending hours tweaking Bambu Studio profiles for every new spool, you must upgrade your extrusion ecosystem.
1. Upgrade to a High-Flow CHT Nozzle
Standard factory nozzles feature a single, smooth internal bore. When attempting to iron viscous matte PLA, the thermal transfer from the outer brass to the core of the plastic is highly inconsistent. This leads to the exact oozing and depletion drop-offs that cause pitting.
You must upgrade your hotend architecture to a premium CHT (Core Heating Technology) nozzle. These advanced components feature internal copper splitters that divide the filament into three separate pathways inside the melt zone. This exponentially increases the heated surface area, ensuring the plastic melts homogenously.
By installing a premium CHT nozzle or an ultra-hard Diamondback tip (available through industrial suppliers via the MatterHackers or ShareASale affiliate networks), you eliminate internal hotend back-pressure. Your Bambu P2S will lay down ironing passes with absolute, liquid precision, maintaining constant pressure across massive flat surfaces without ever running dry.
2. Implement Active Filament Desiccation
We established that matte PLA boils easily due to its particulate additives. If that matte PLA has also absorbed atmospheric humidity, the problem is magnified tenfold. Trapped moisture flashes into steam inside the 220°C hotend, creating violent micro-explosions that physically blow holes in your pristine top layer.
Storing filament in a passive AMS unit with silica gel is insufficient for achieving perfect top surfaces. You must invest in a premium, active, heated filament desiccation system like the Sunlu S4. These units actively bake the moisture out of your spools at 50°C, feeding bone-dry filament directly into your extruder. Securing an industrial-grade dry box through authorized direct networks on Impact guarantees your polymer behaves with absolute thermodynamic predictability, locking in your ironing settings permanently.
[IMAGE PLACEHOLDER: A professional studio photograph of a premium CHT nozzle installed in a 3D printer hotend next to an active heated filament dryer + Alt Text: Upgrading your thermal ecosystem to permanently fix 3D print ironing pores.]
Quick-Action Preventative Maintenance Checklist
To maintain your flawlessly smooth, glass-like top surfaces and protect your hardware investments, implement this strict preventative maintenance protocol before your next major production run:
- Clean the Nozzle Exterior: Matte PLA is inherently sticky. During a 15-hour print, microscopic amounts of plastic will cling to the outside of the hot nozzle and carbonize. When the toolhead lowers to execute the ironing pass, these burnt chunks will drag through your pristine layer, carving deep trenches. Scrub the nozzle tip completely clean with a brass wire brush while heated before every print.
- Audit Your Filament Diameter: Never trust the factory label. Use digital calipers to measure your new spool of matte filament in five different spots. Input that exact average diameter into your Bambu Studio filament profile. Viscous matte filaments that fluctuate in diameter will instantly ruin your volumetric ironing calibrations.
- Check Extruder Gear Tension: Ironing requires the extruder motor to push incredibly small, precise amounts of filament (often less than 2 mm3/s). If your extruder tension is too loose, the gears will slip during this ultra-slow phase, causing immediate starvation and pitting. Ensure the gears have a firm, biting grip on the filament.
- Lubricate Z-Axis Lead Screws: Ironing relies on a microscopic interference fit. The nozzle must hover exactly 0.05mm above the plastic. If your Z-axis lead screws are dry or binding, the bed will sag by a fraction of a millimeter, completely destroying the physical contact required to iron the part. Re-grease your Z-axis weekly.
By treating your 3D printer as a high-precision fluid dynamics system and respecting the unique chemical properties of matte polymers, you will completely eradicate frustrating surface defects. Master your line spacing, control your thermal depletion, and start manufacturing with elite, industrial-grade perfection.